Pond v3: Almost There!

Just a couple pics to show the current state of work. You can get a pretty good idea of how the finished product will soon look. Things still left to do are finishing the fountain, stone details/joints, installing lights and fountain pump, running/burying electric lines into the garage and cleaning up and restoring the landscaping. The little round flowerbed by the filter basin was the only casualty from the work, so it needs re-planted. But it’s well in hand at this point. I think it’s kinda funny how you start into a project like this and after a couple-few days of digging a big hole don’t realize you are only about 5% finished with all the work needing to be done at that point. I’ll make another post later in the season when everything is in full bloom and looking nice.

Pondv3-16
I’ll get the sump liner sealed up and do a flagstone top around that flowerbed, as well:

Pondv3-17

Pond v3: Update2

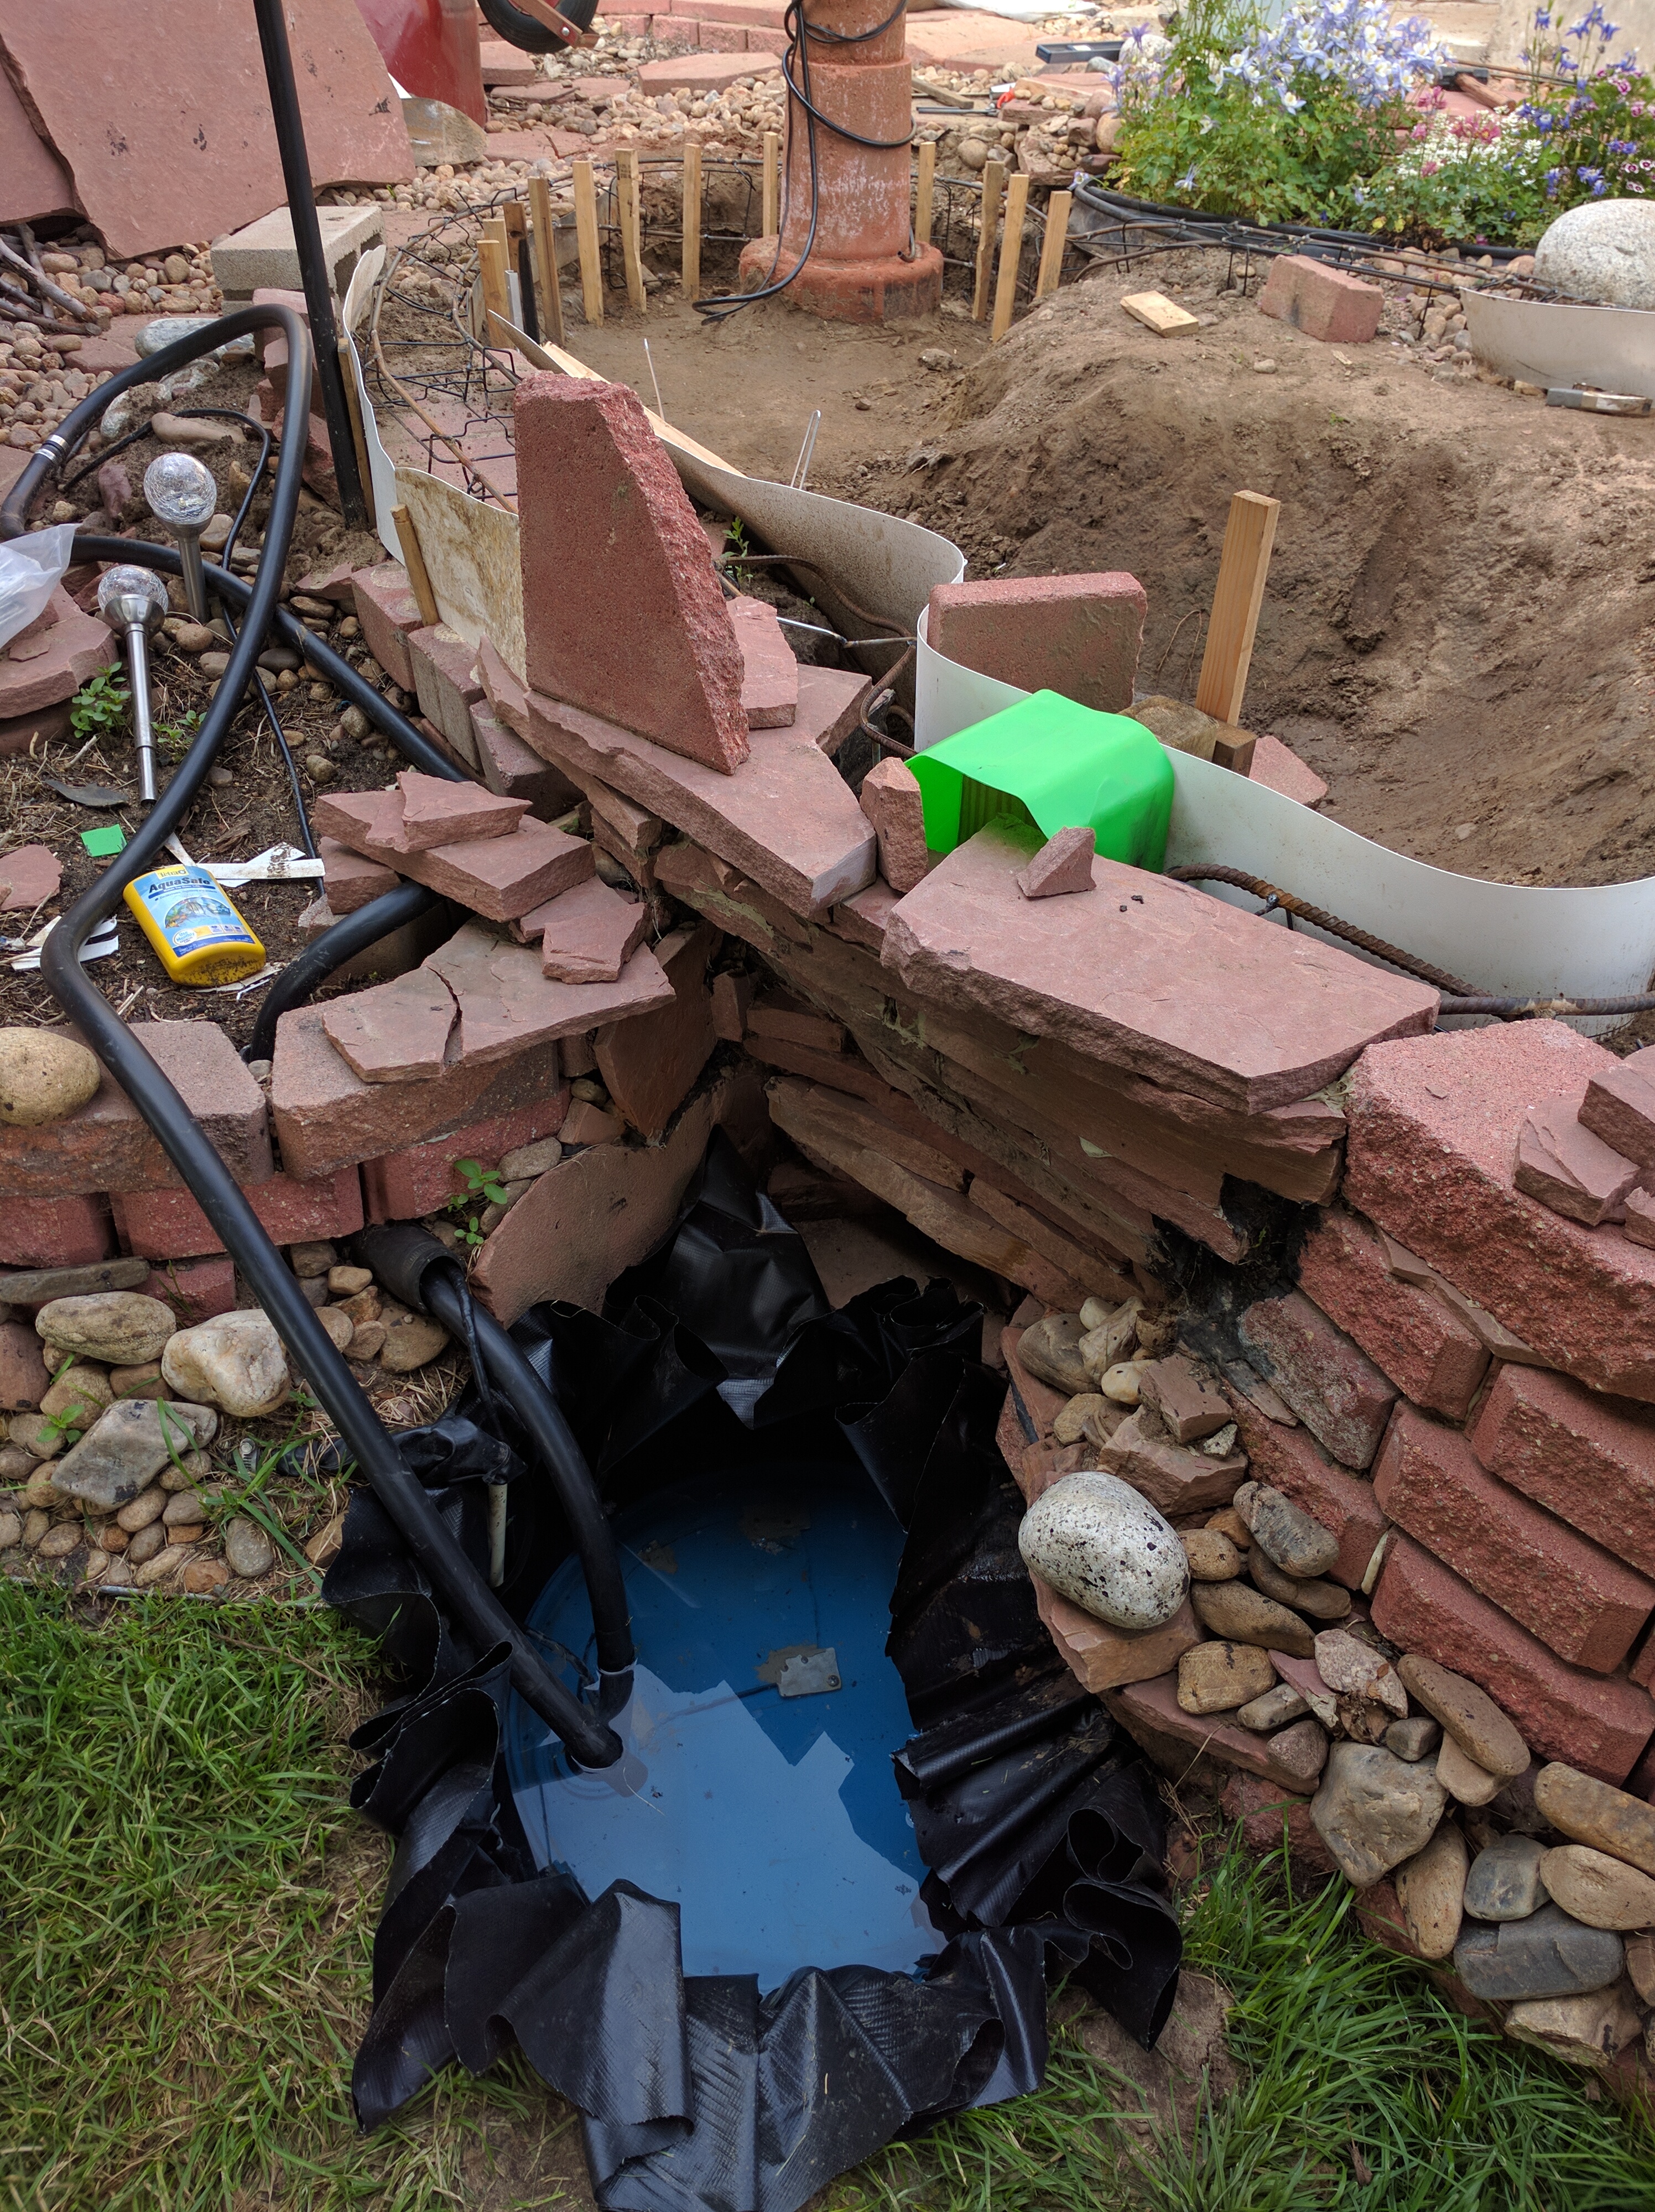
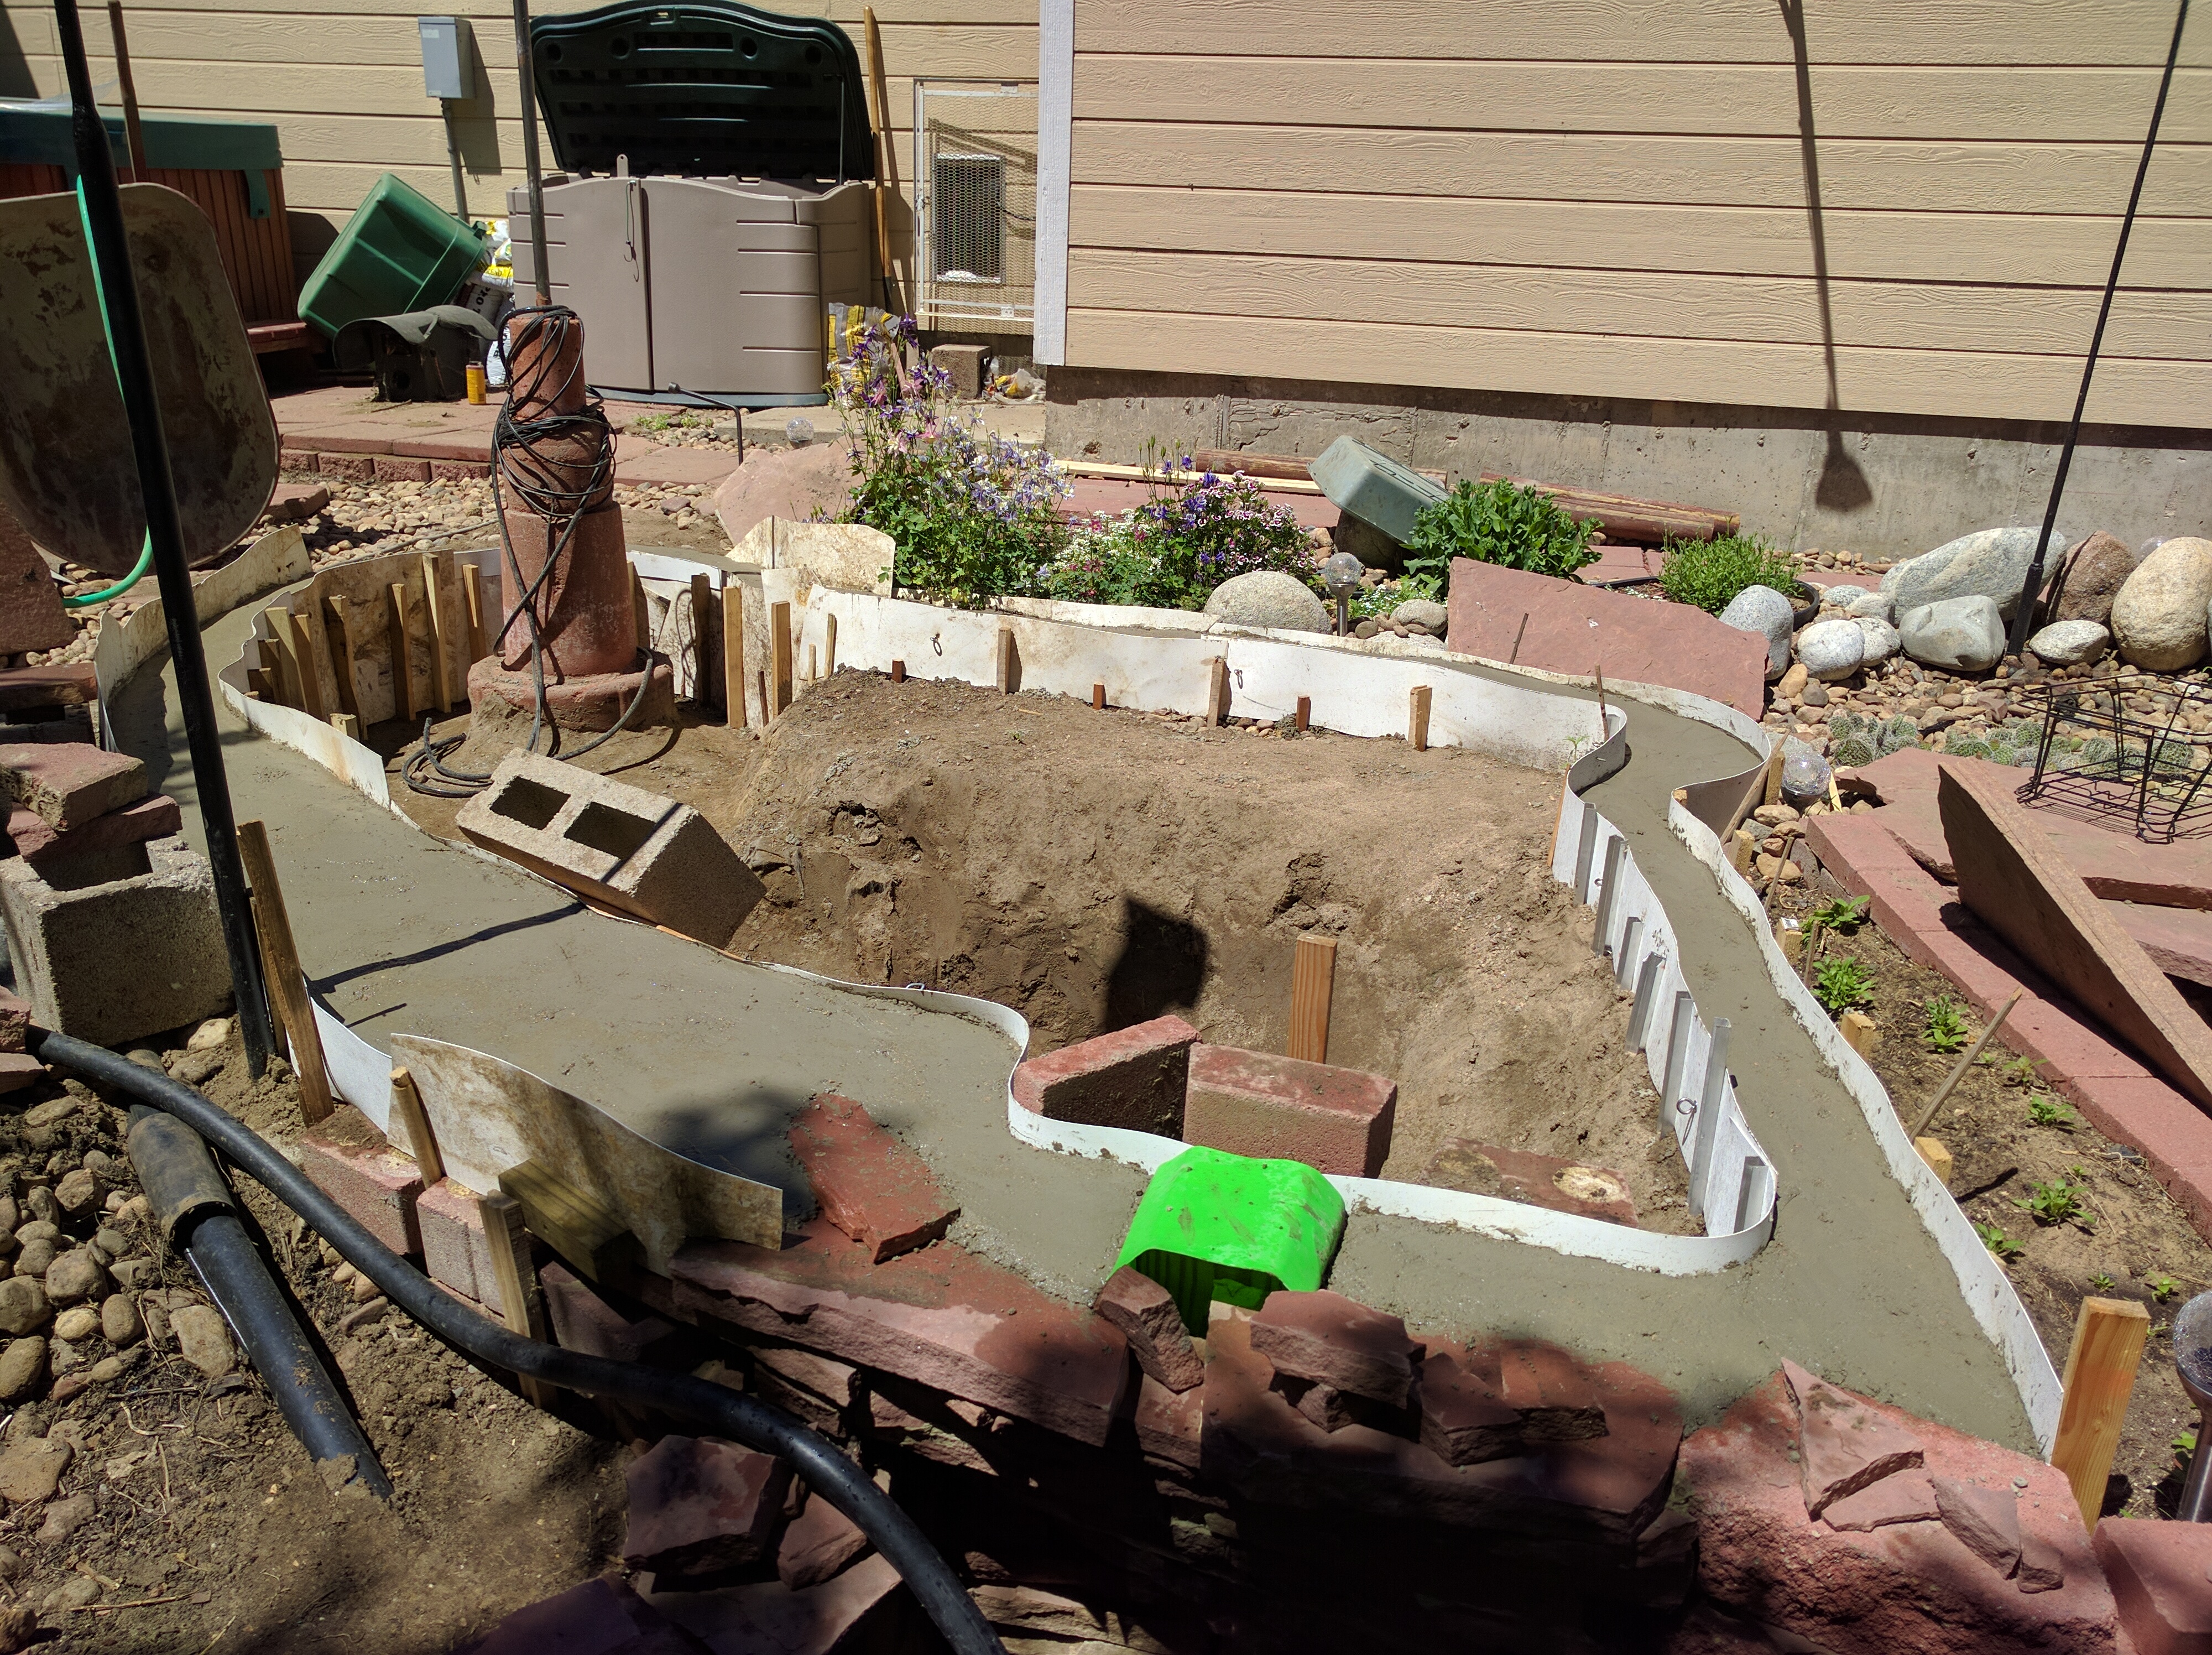
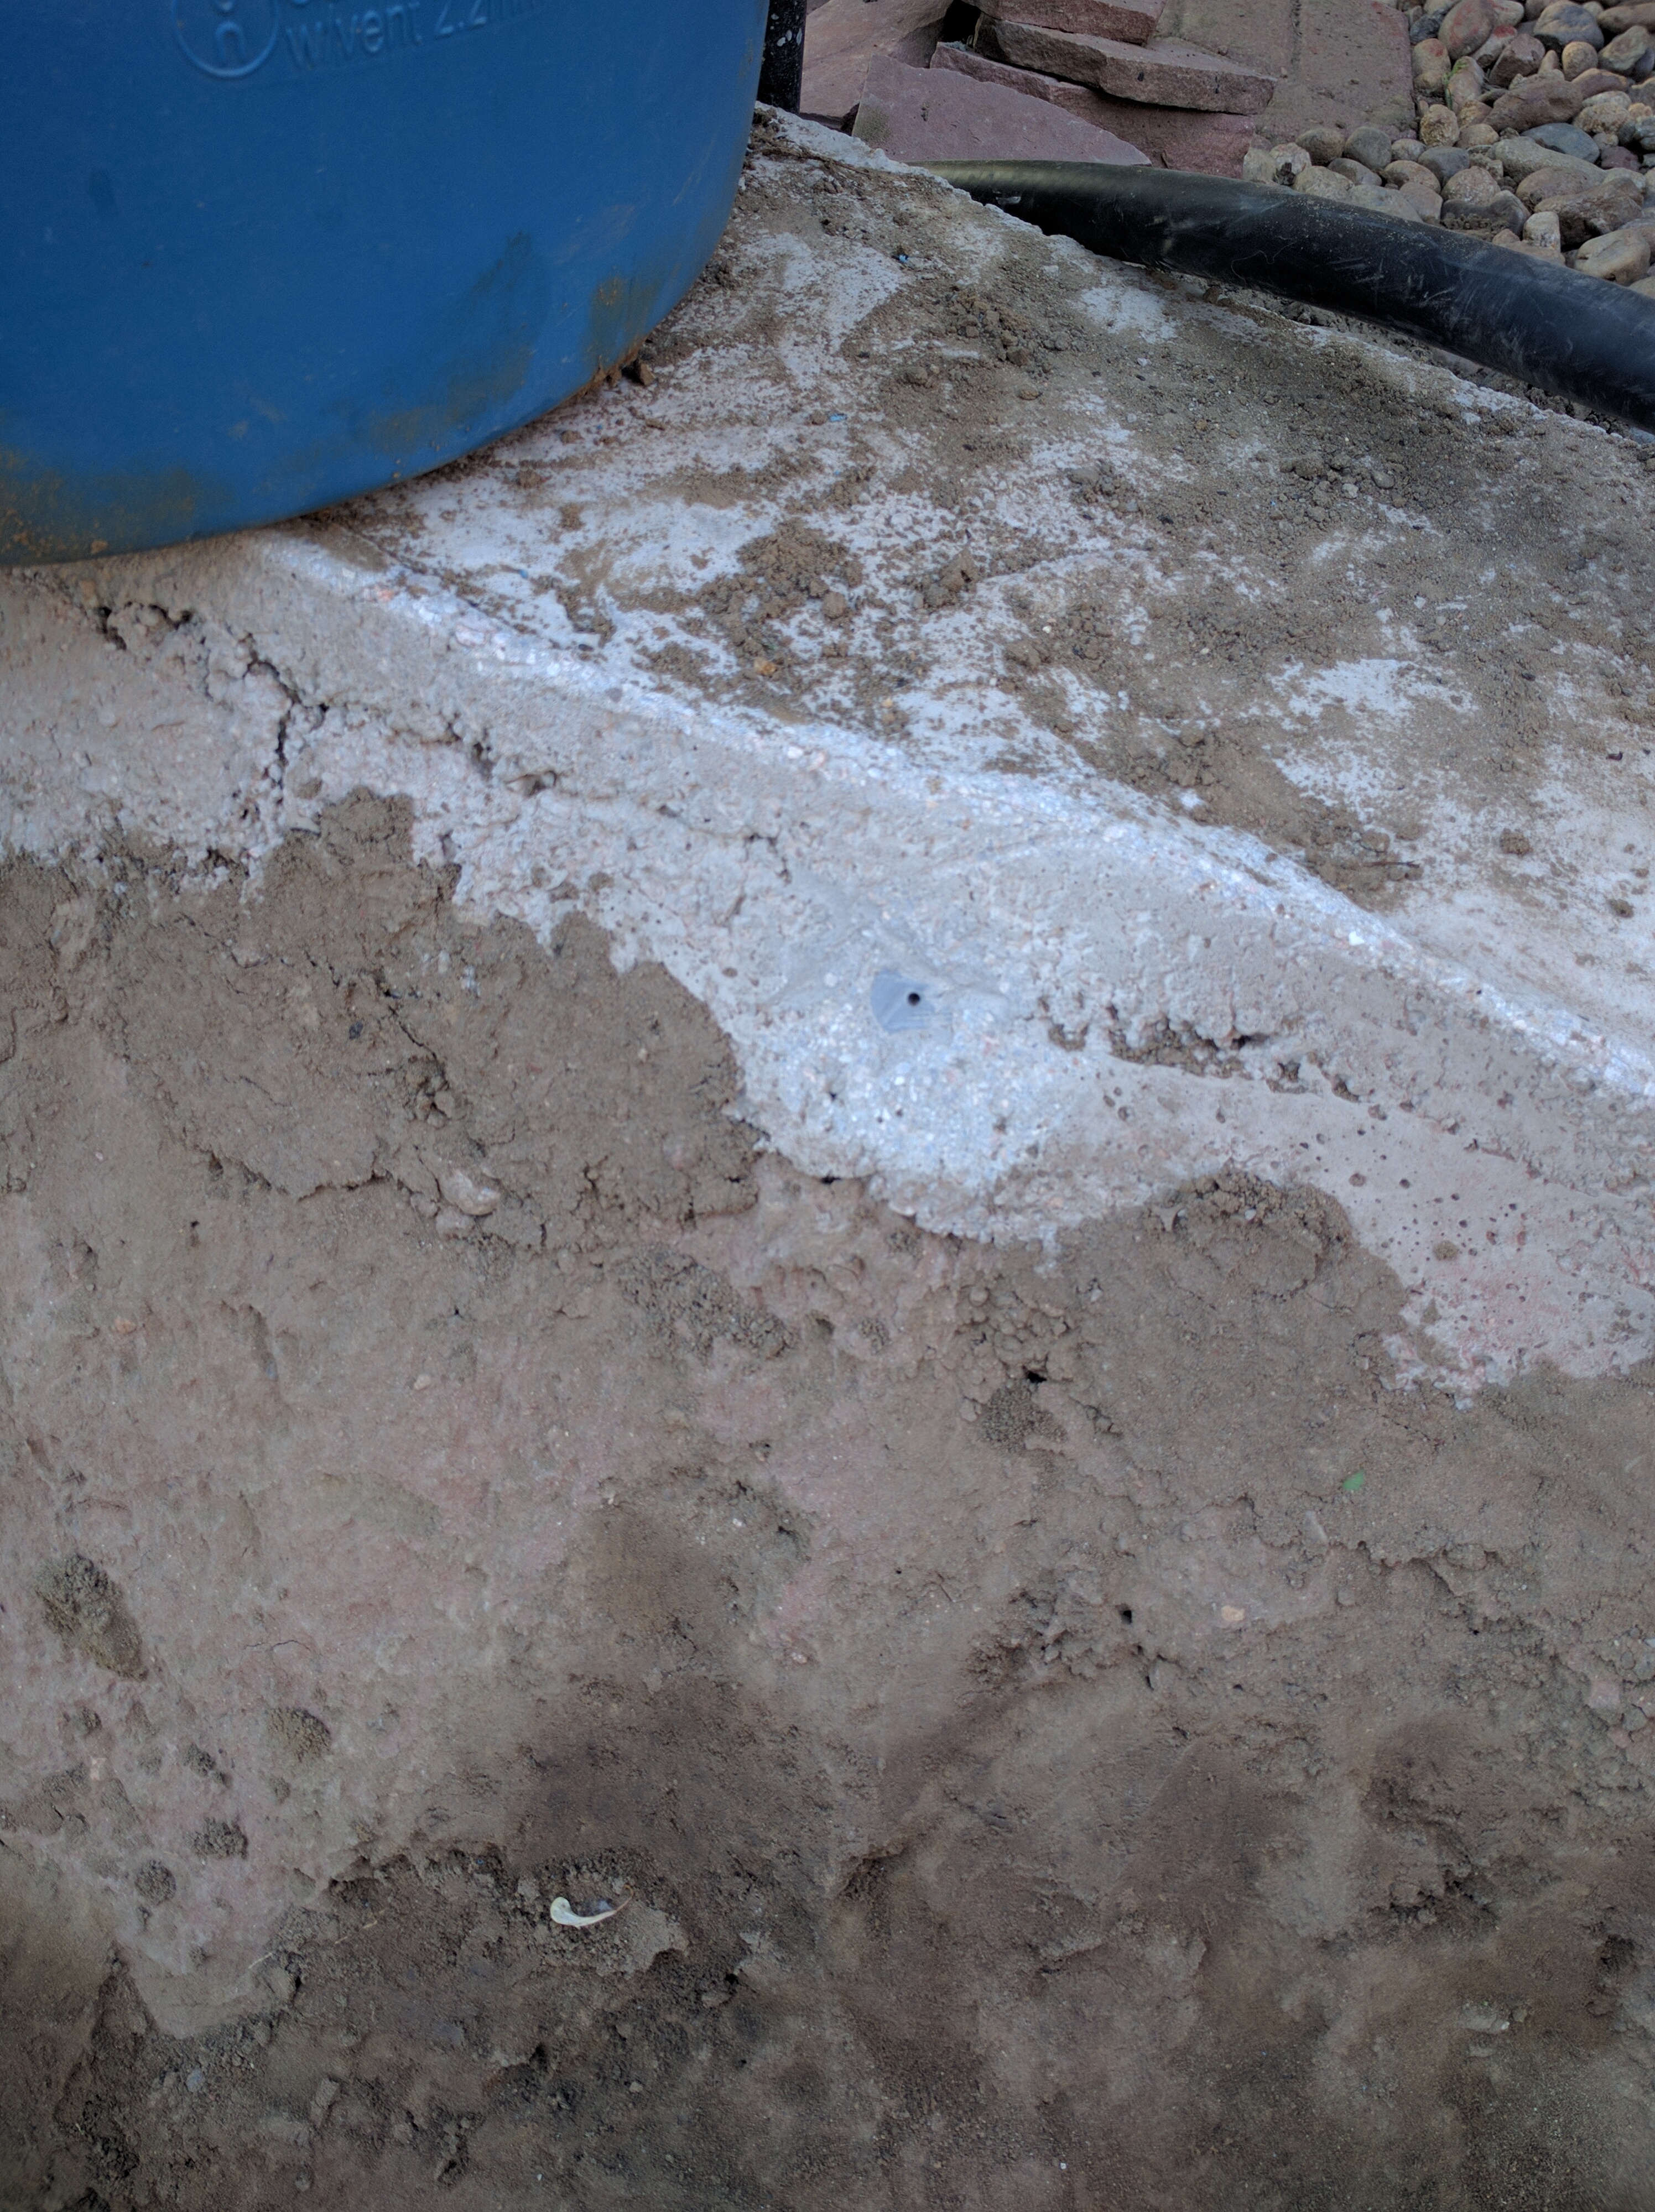
Over the past week I’ve ramped up the work pace to really get this project moving. Concrete was done last Sunday. The top edge is pretty close to level all the way around now. That solves one of the biggest problems I always had with it. I could never get it filled clear up to the top due to leakage around the edge somewhere. It’s built into a gradual downslope, so that always became an issue at 2 or 3 problem spots and caused the water level to be lower than I wanted.

Pond v3-04
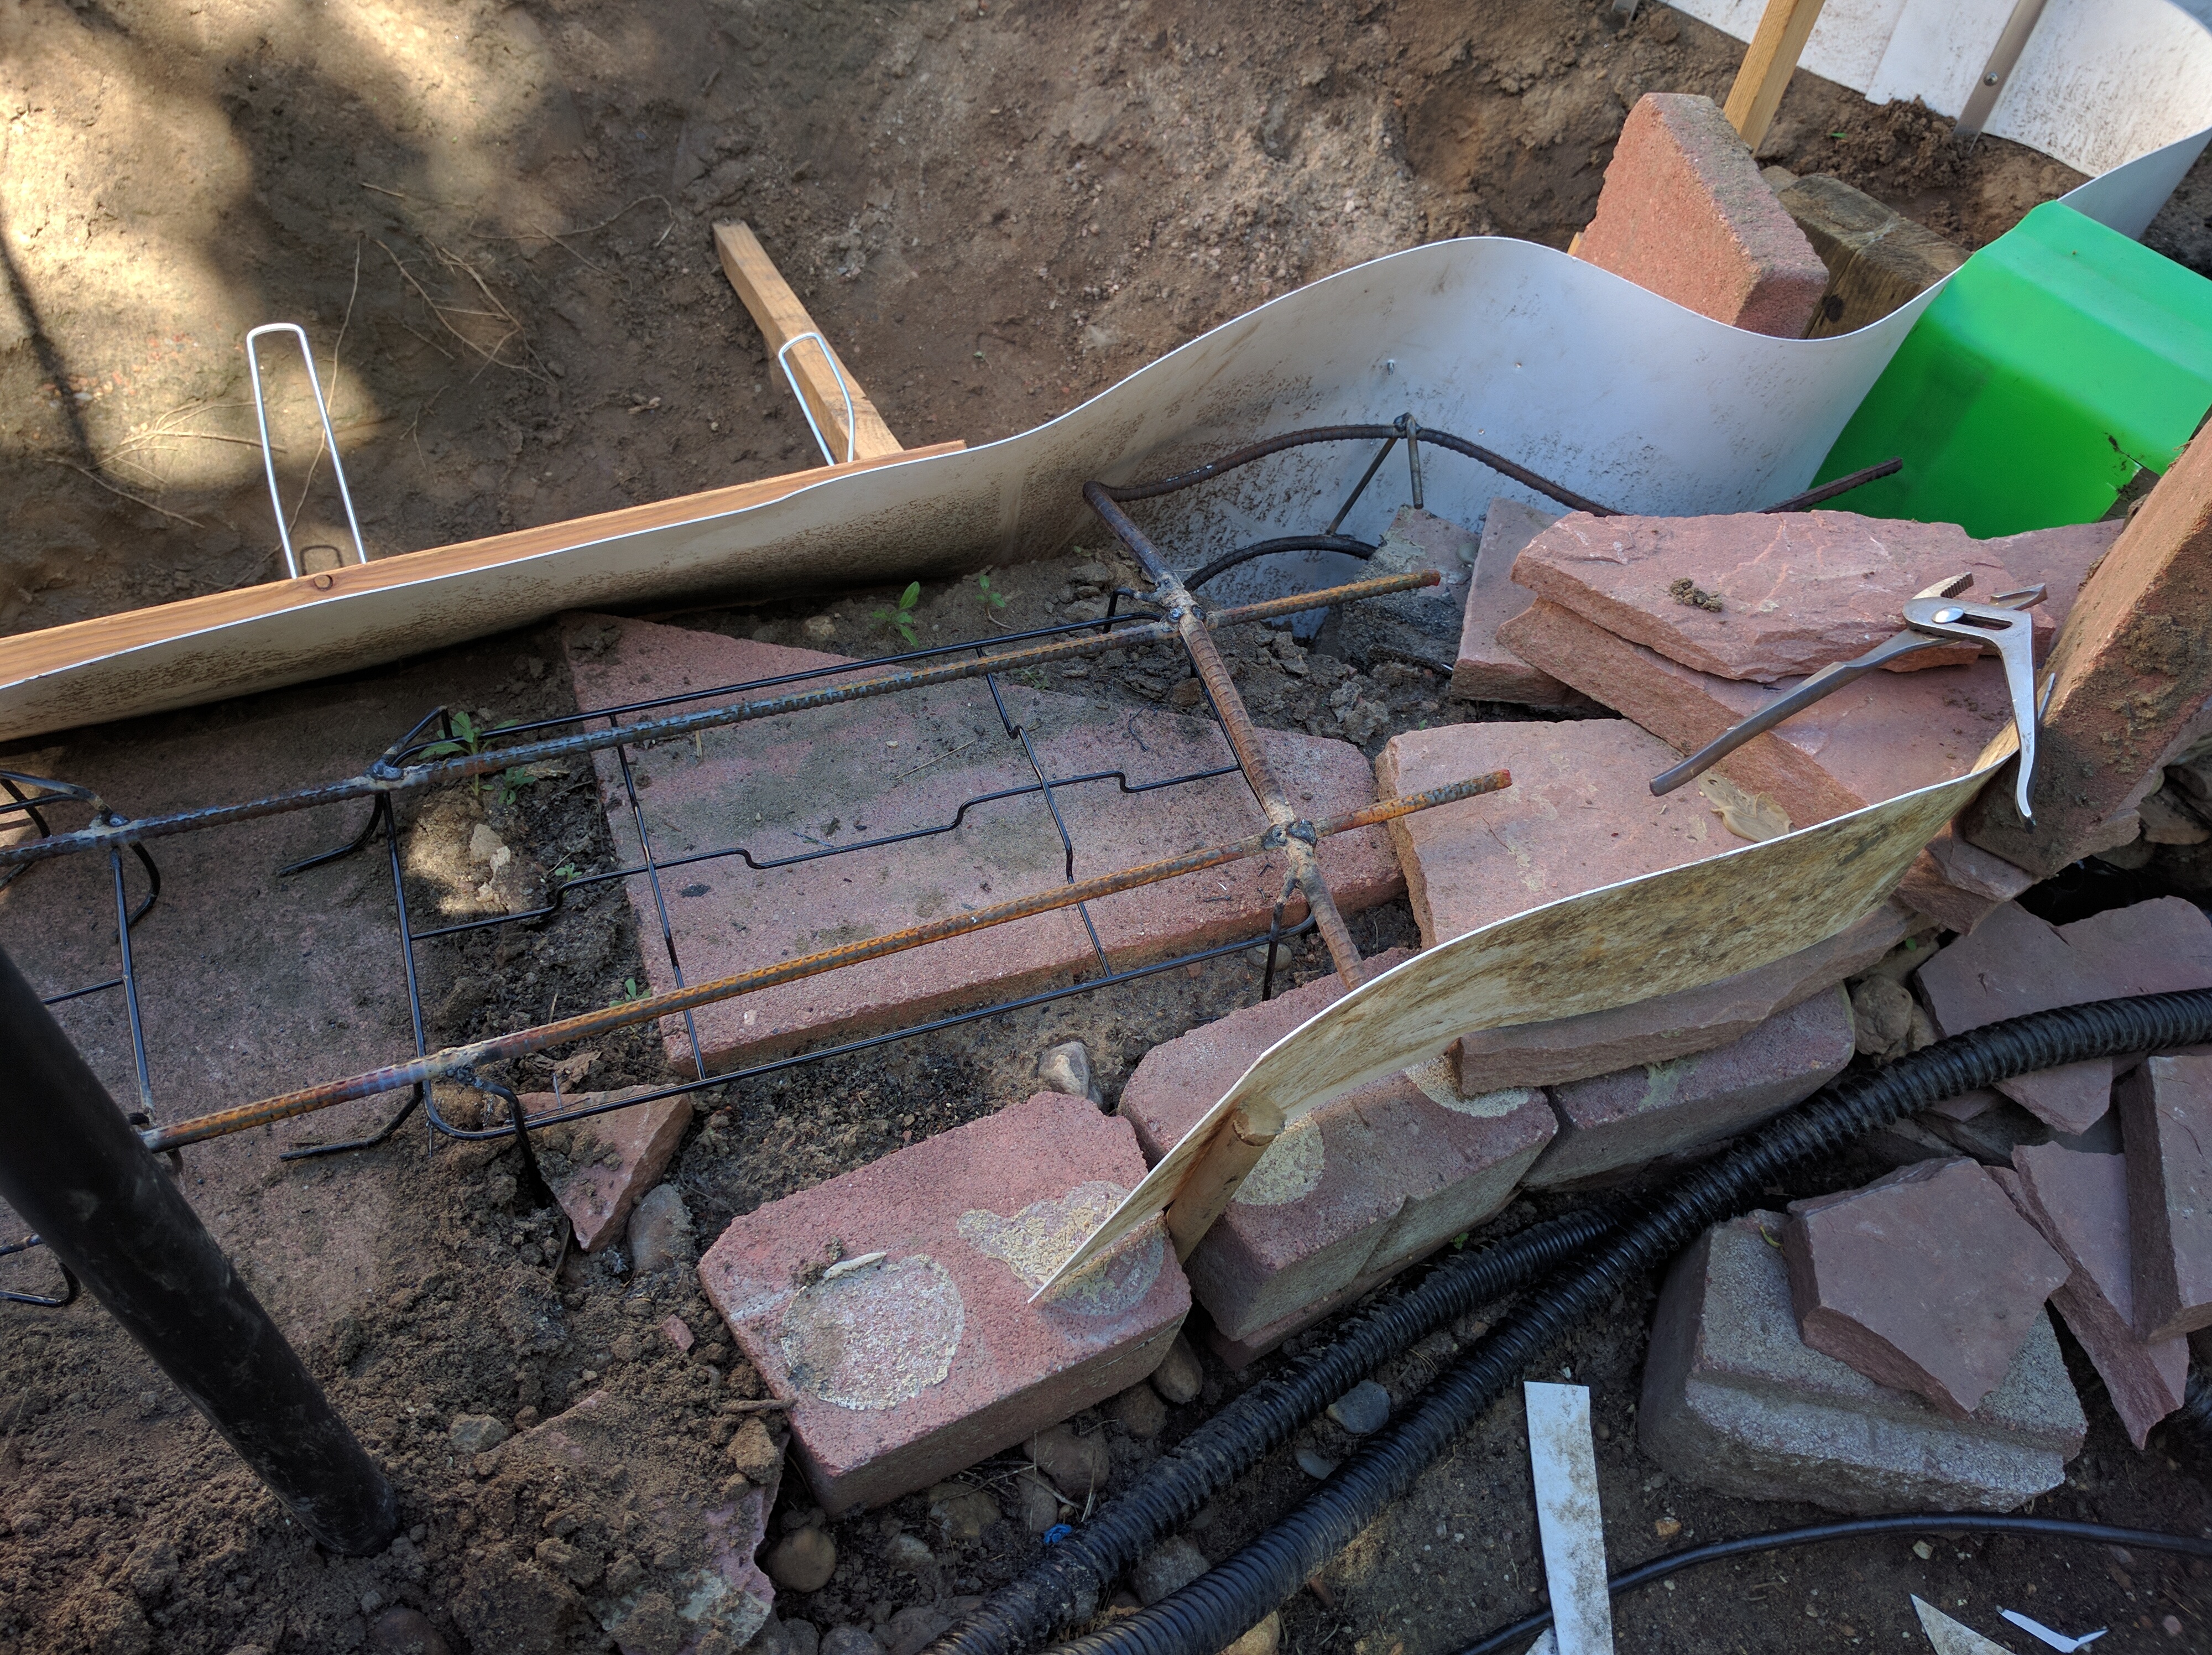
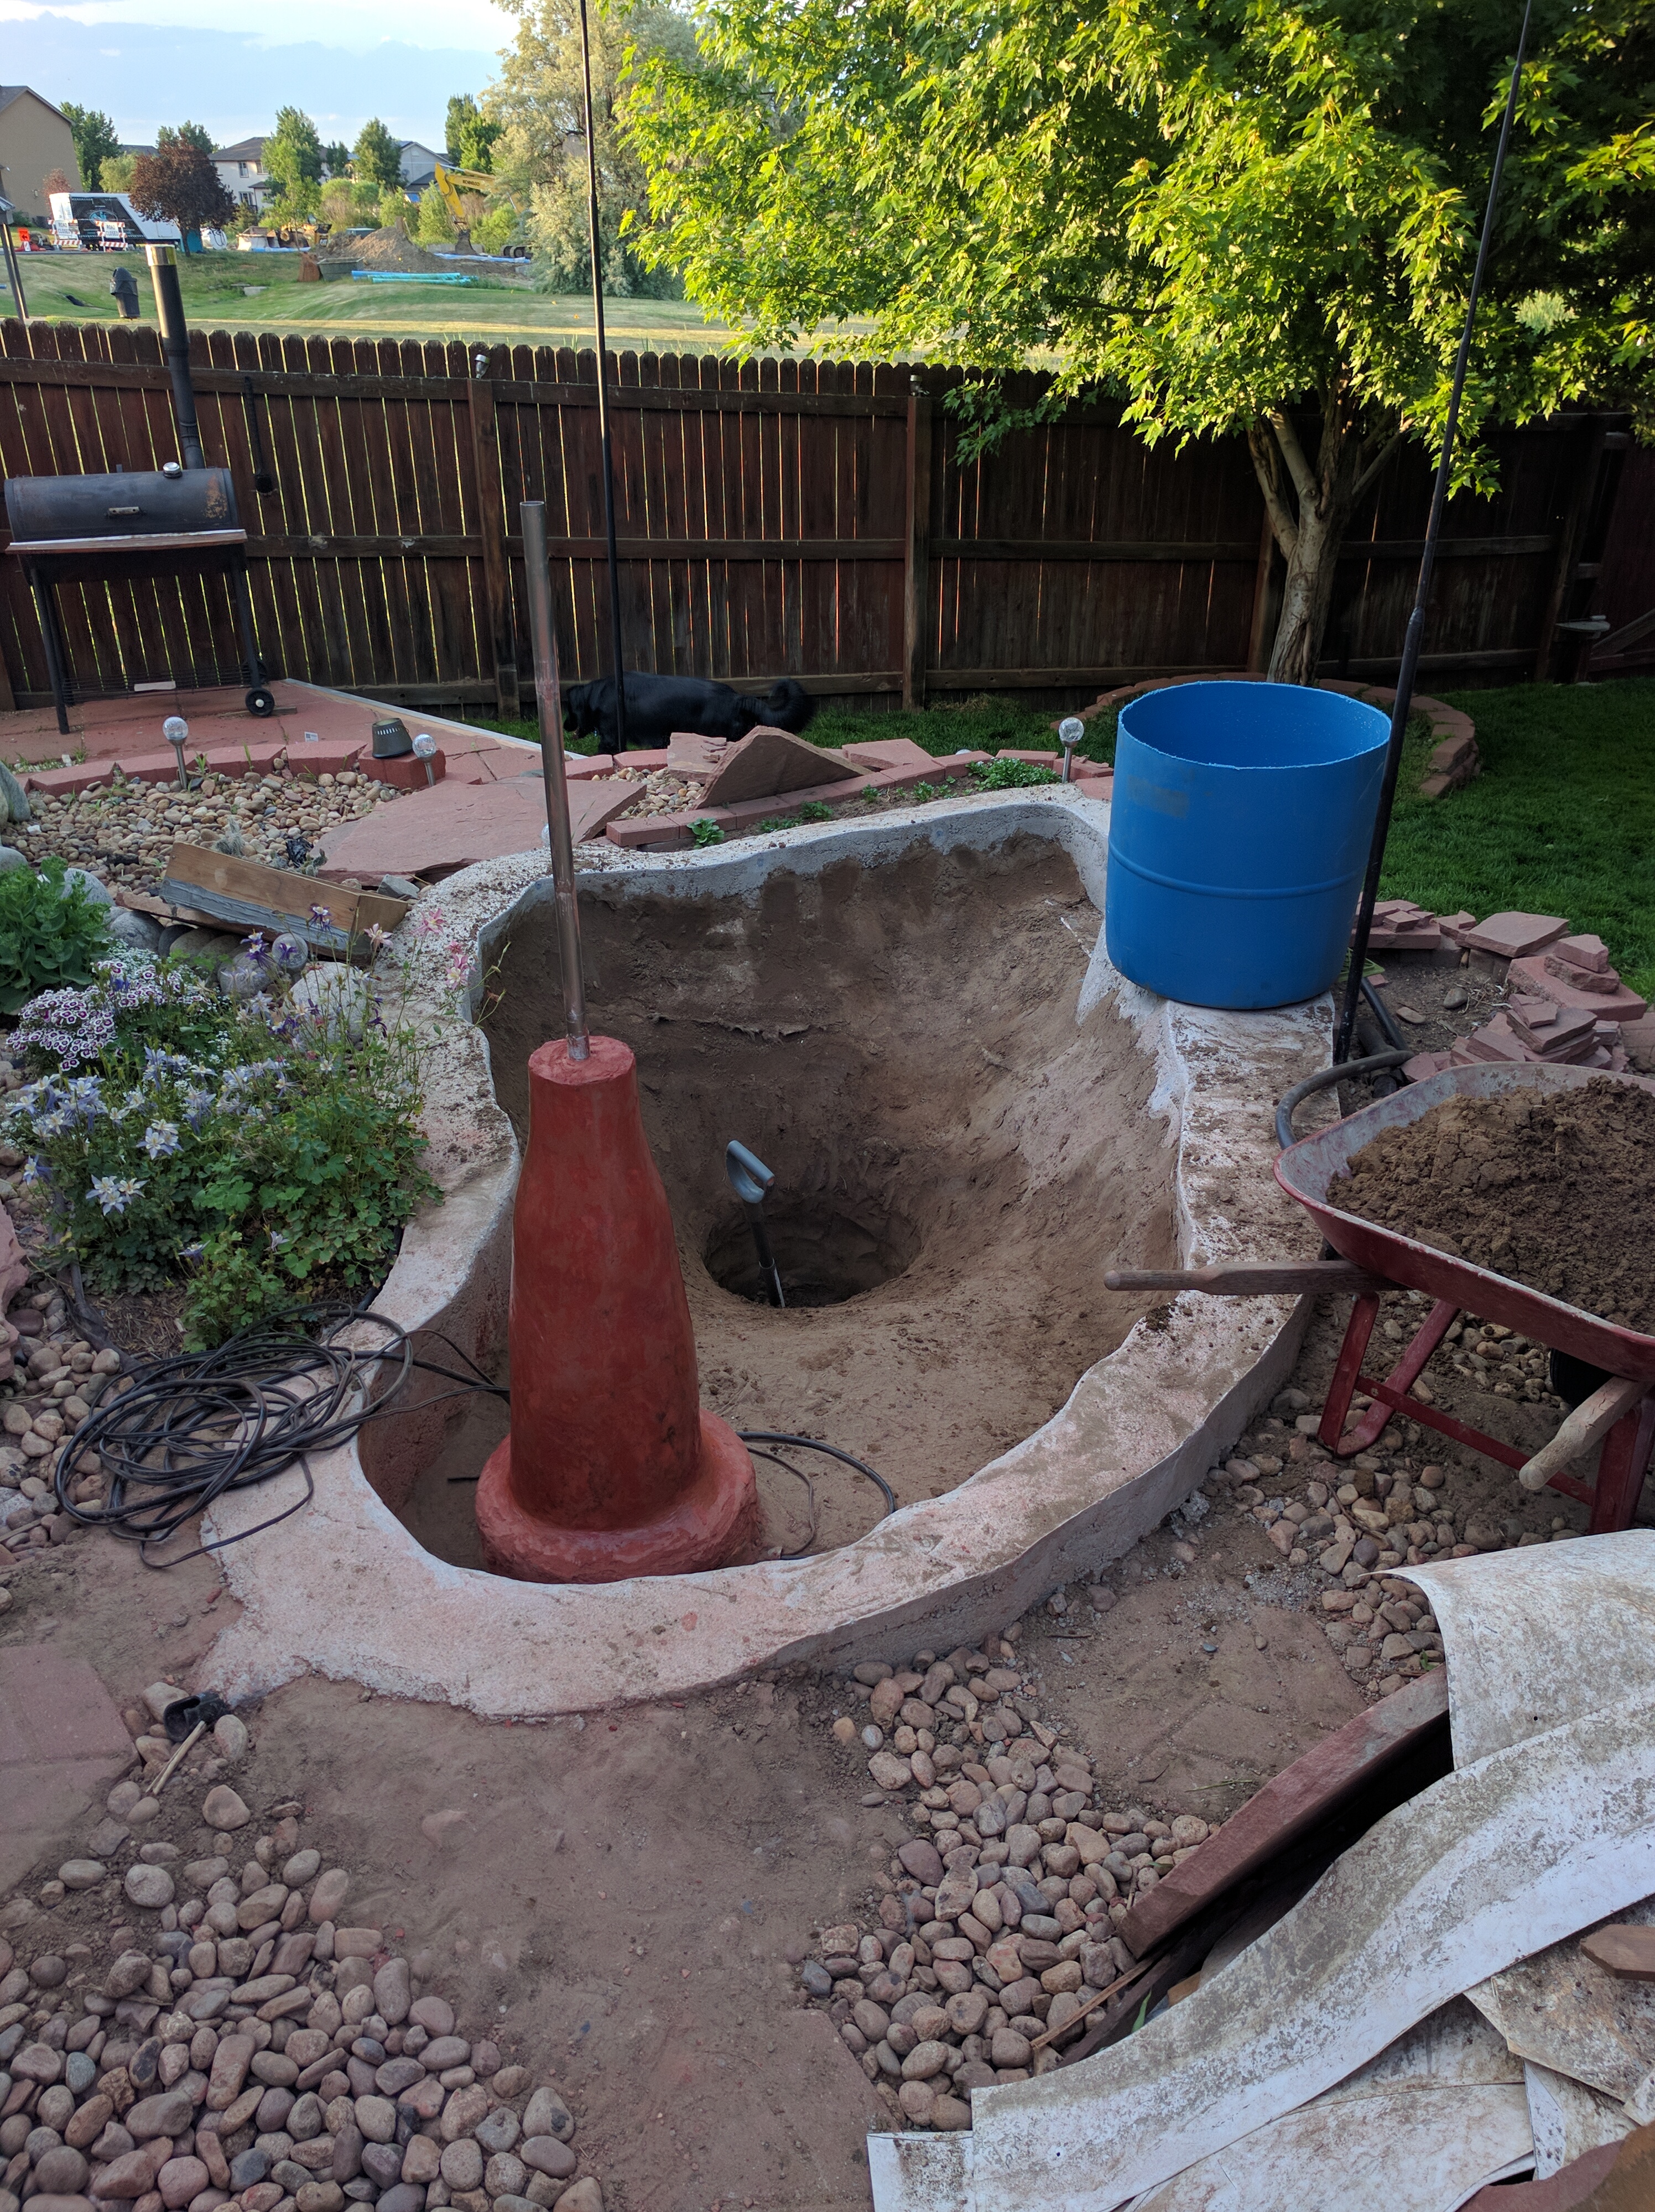
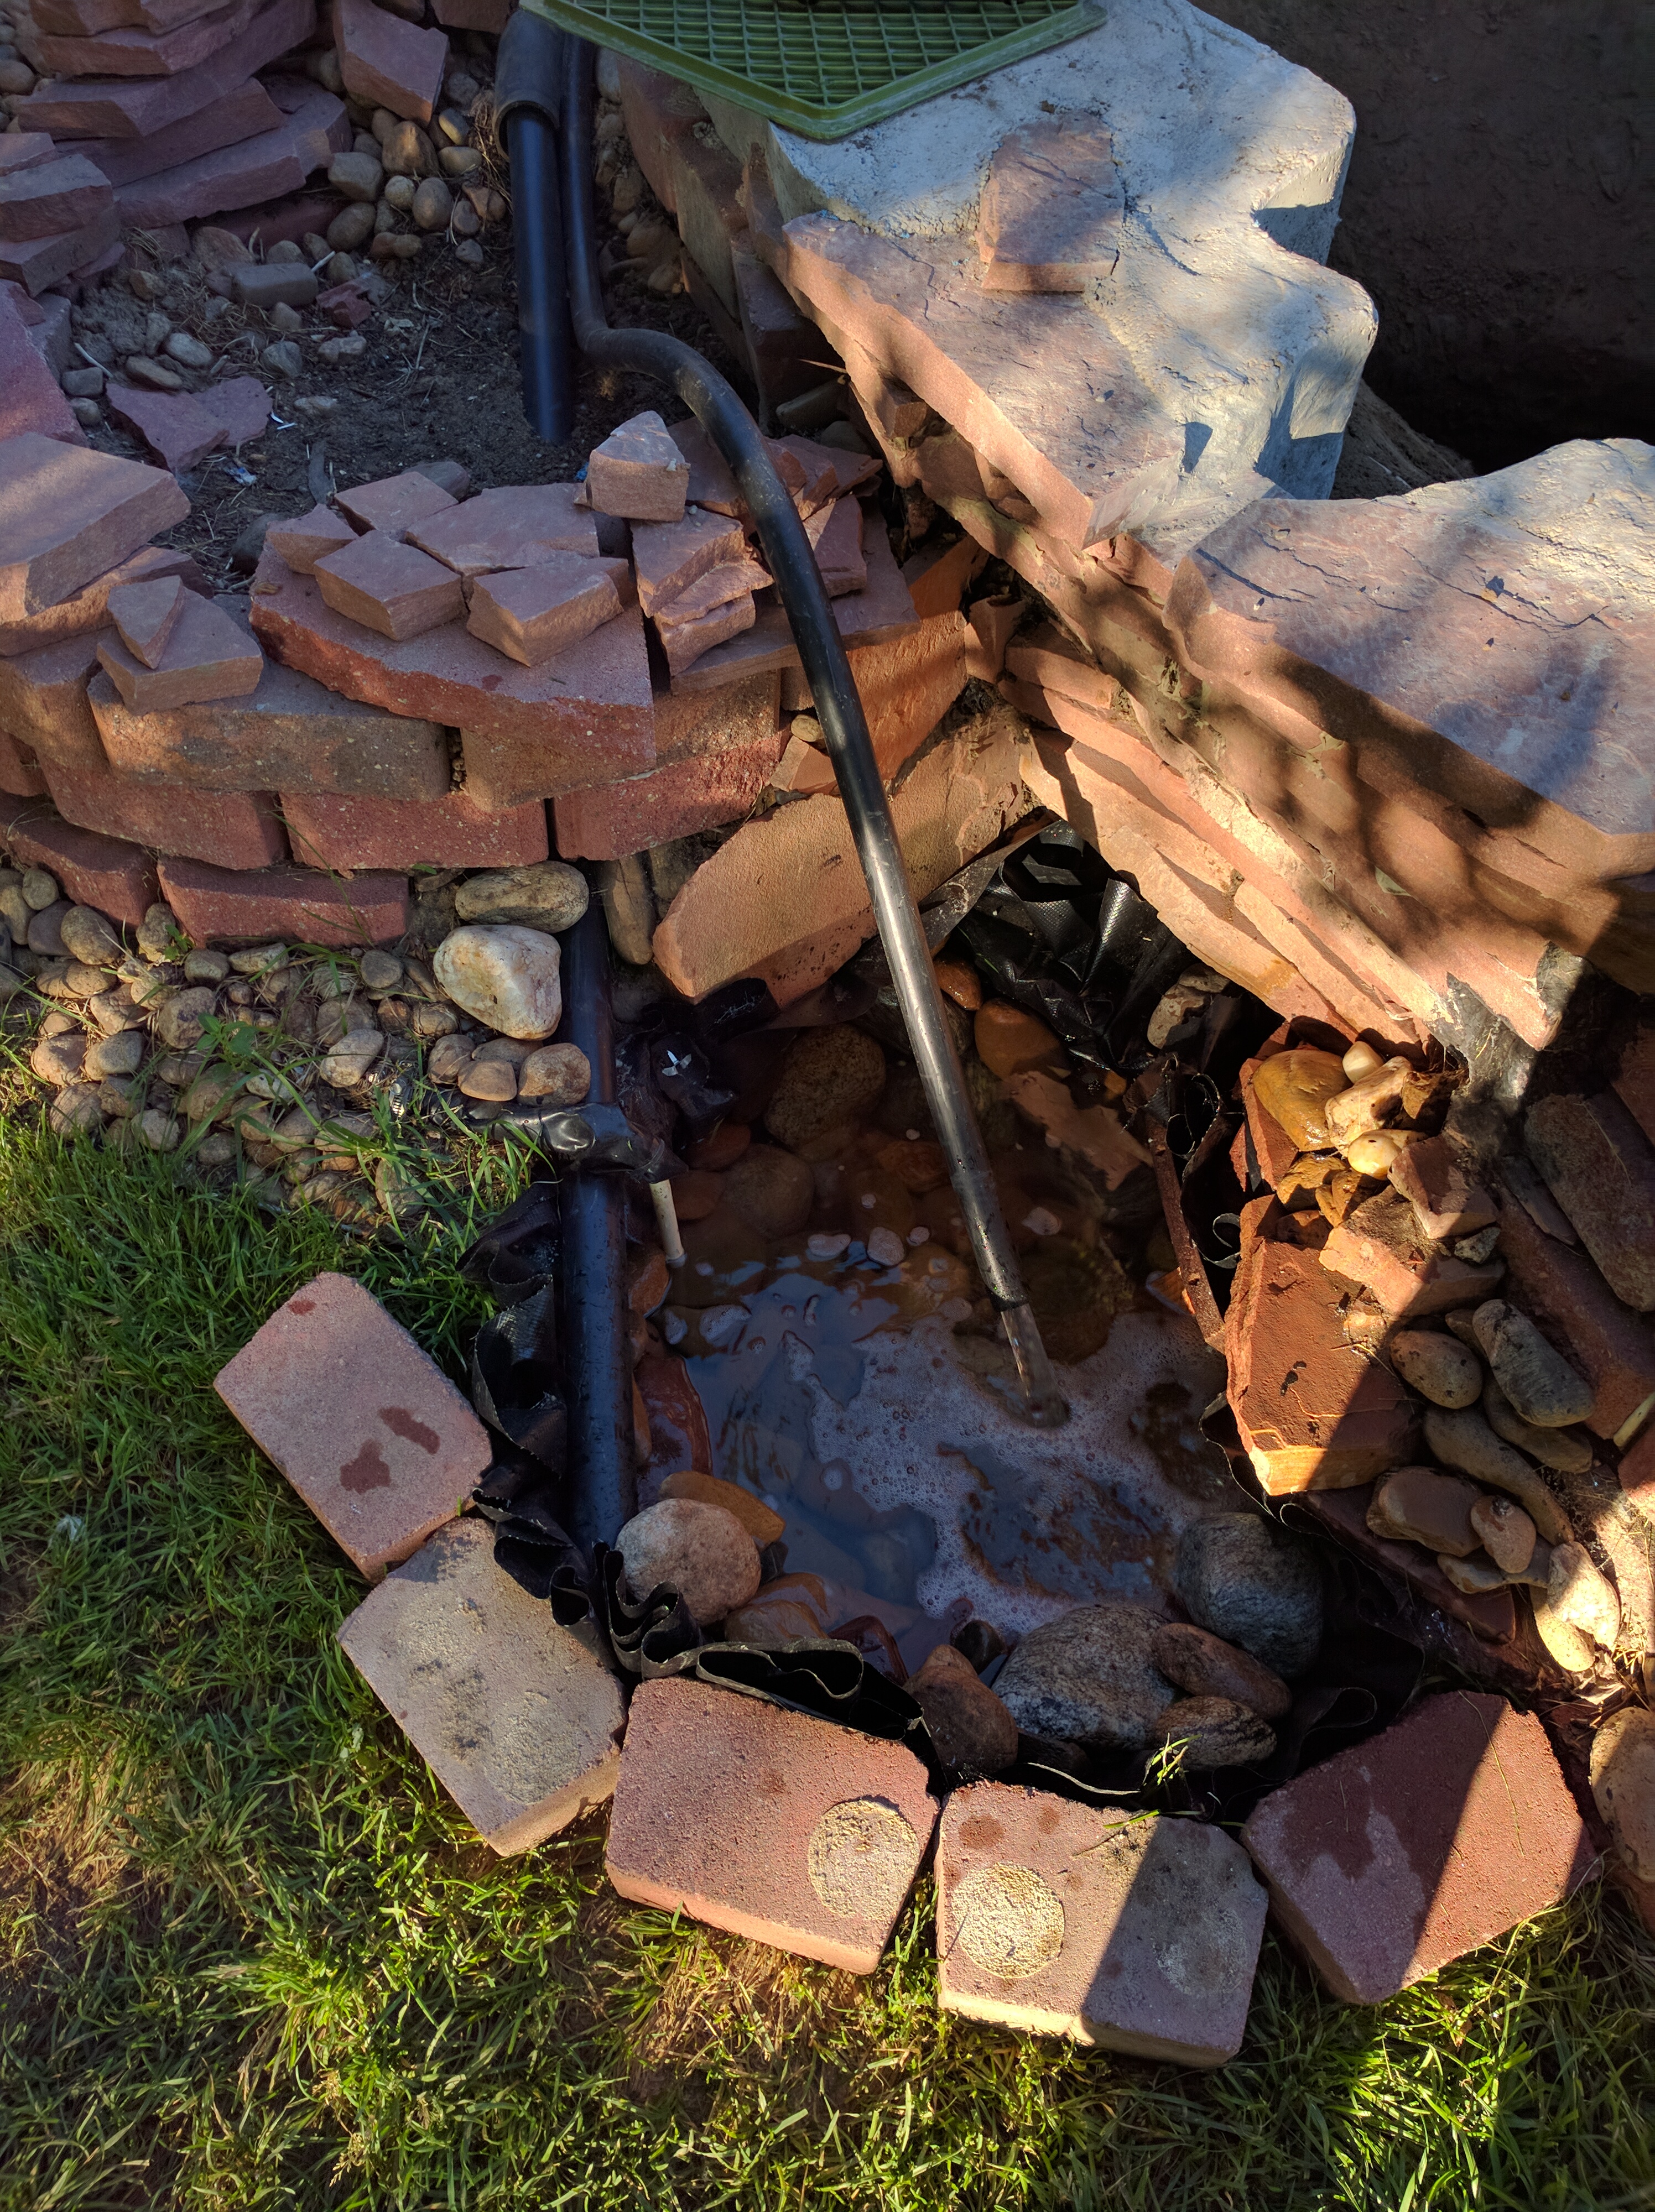
The fountain pedestal was problematic. I’m no professional mason, but finally managed to get it shaped, polished and sealed in an acceptable fashion. You can also see how I did the ingress points for water return and electric in the next 2 pics:

Pond v3-05
Pond v3-06
There are a total of 12 ingress points through the liner. I still need to fabricate a backing grommet for the fountain bottom. The little ones (shown below) are made from PVC dowels to accept stainless screws and screw-eyes. They will be used to fasten floating plants, lights and to control lettuce and  duckweed or whatever else ends up in there:

Pond v3-10
Here’s another pic showing a better view of the water return line:

Pond v3-07
I’ve had the sump/filter running in test mode for the past couple of weeks, and it seems to be operating as expected. The filter is made up of 63 wiffle balls covered with 2 bags of polyfill. This is actually a low-budget project, believe it or not. The biggest expense so far was about $100 worth of Quickrete. I got the poly drum for $10 from my methanol supplier. I think I’ll use 3 bags of poylfill next time, but it seems adequate with 2 for now. Bird netting separates the polyfill from the top layer of rocks. The landscape blocks around the sump edge are just holding up the liner for now, and I’ll get that properly finished at some point.

Pond v3-08
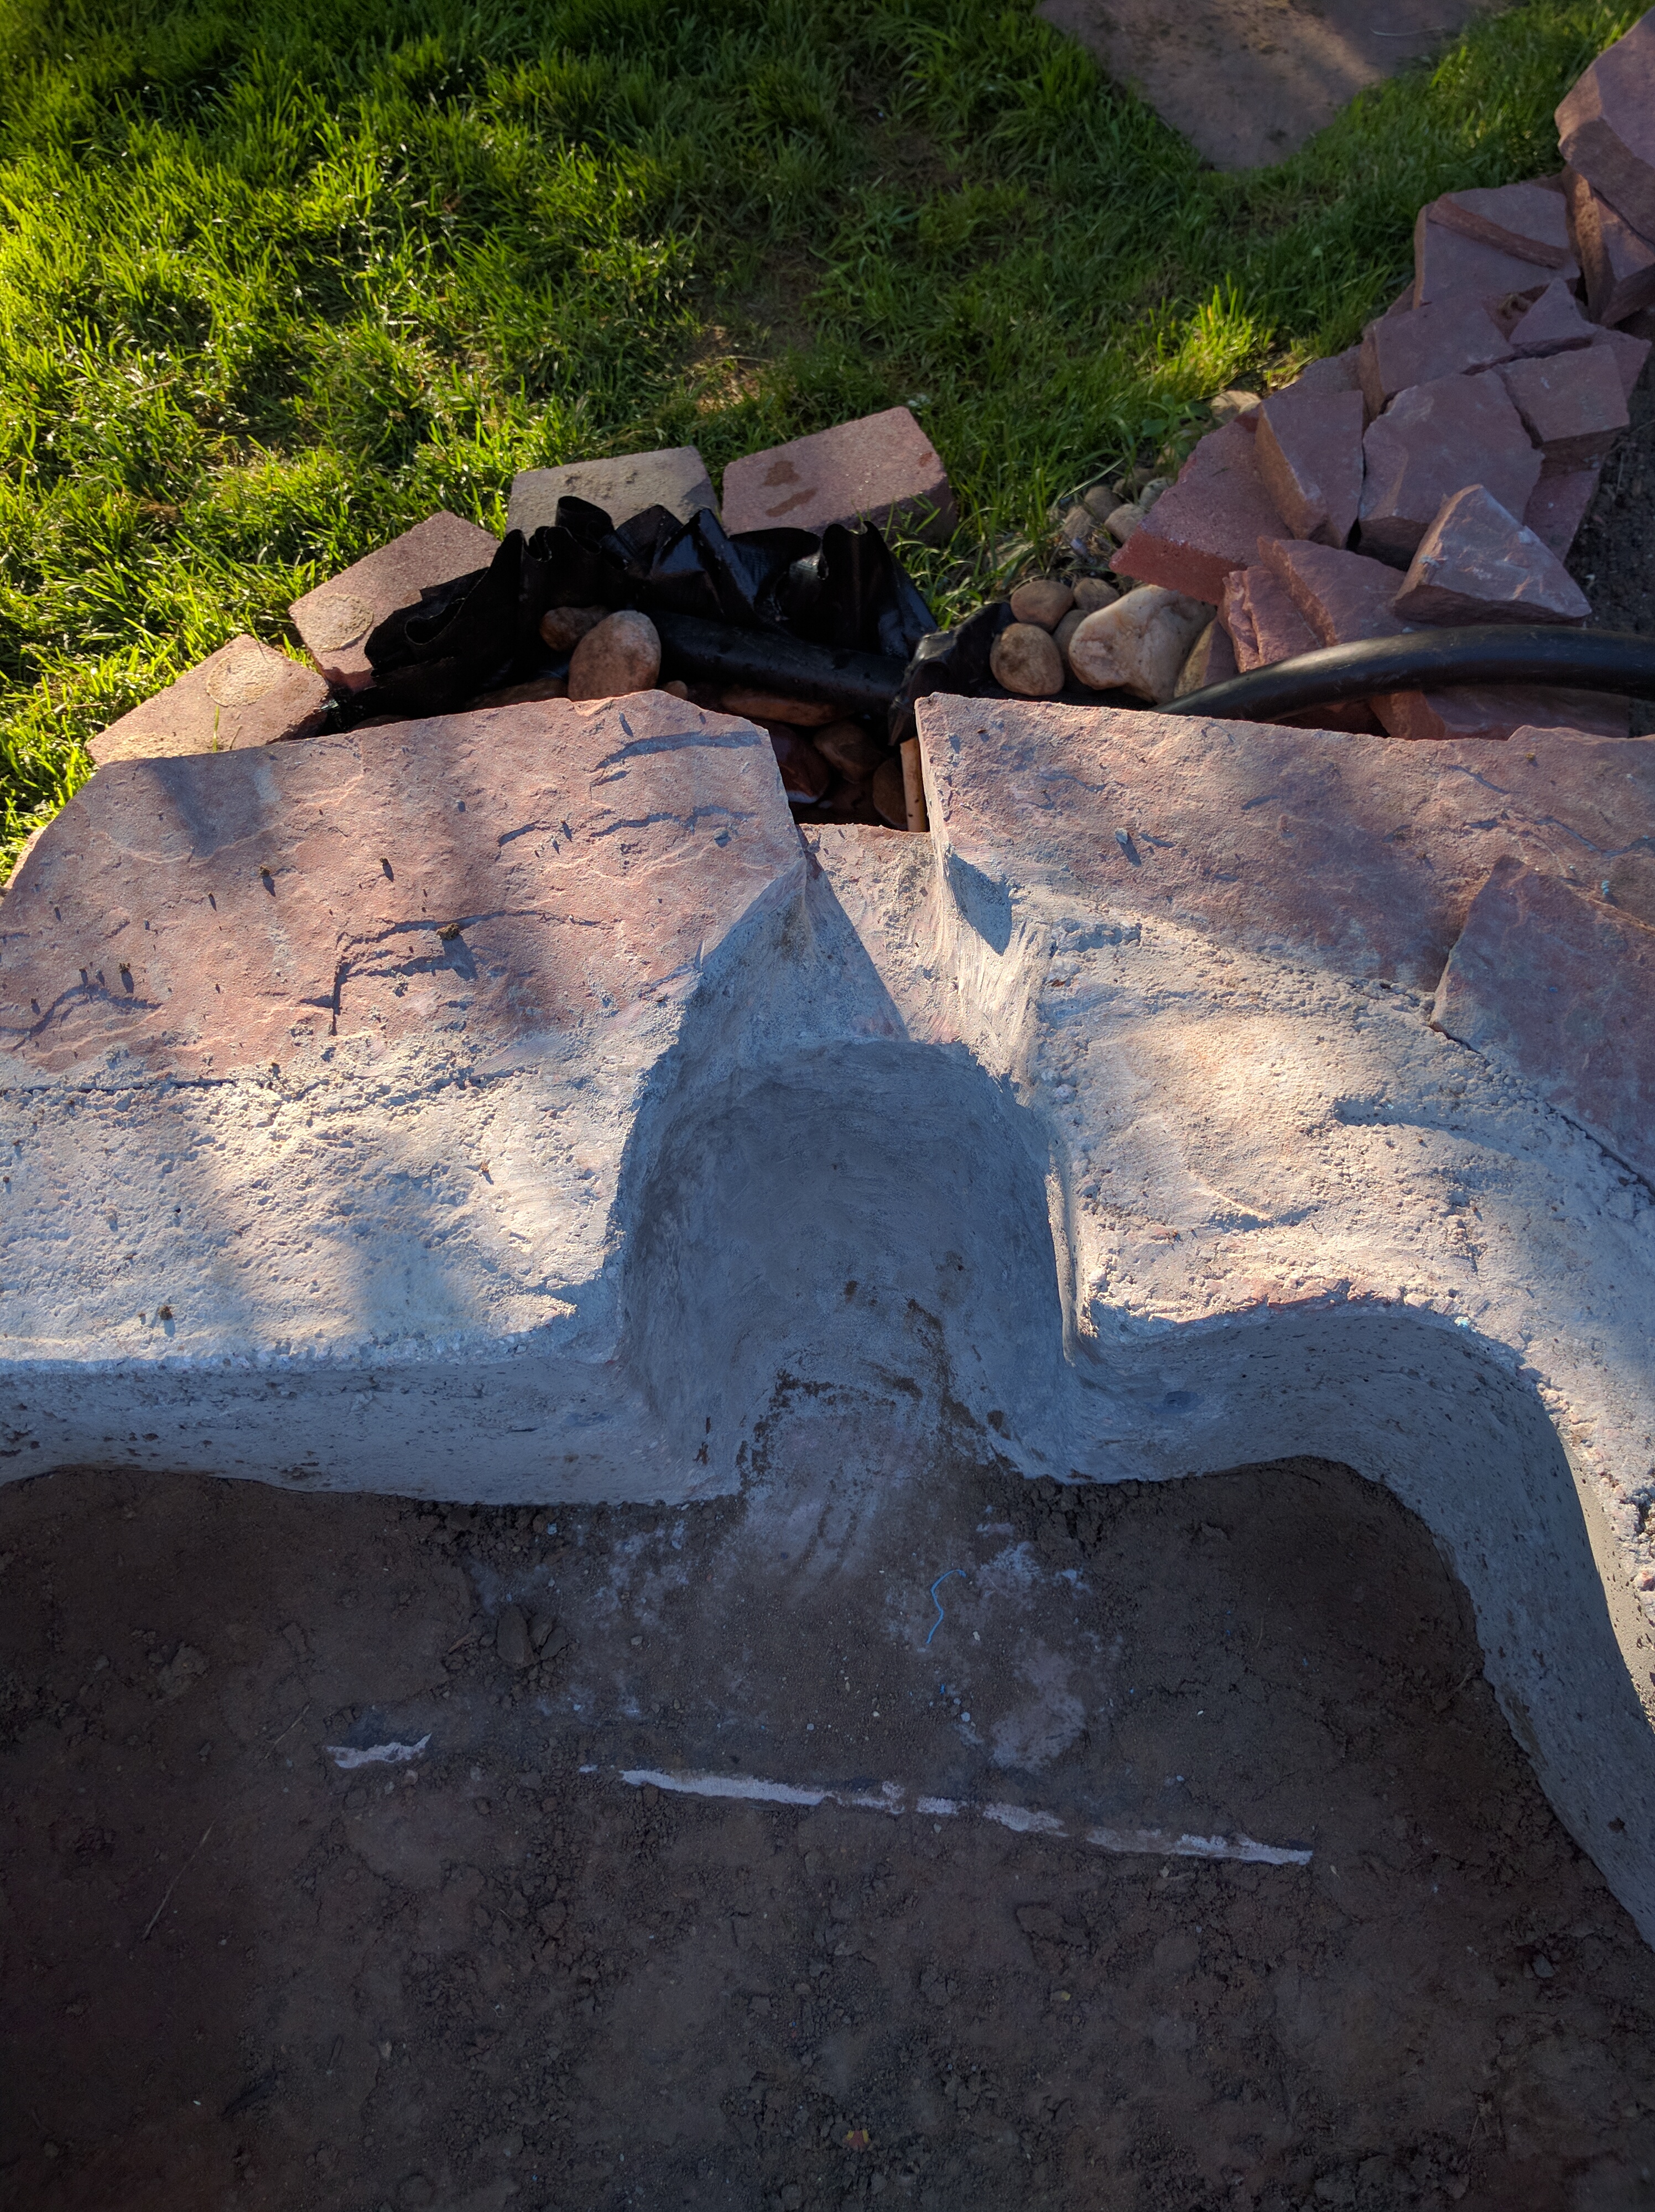
Where the water falls out to the sump here will be covered after the top is finished with flagstone all around:

Pond v3-09
Depth in the middle ends up being about 4 feet. Liner goes in today.

Pond v3: Construction Update

As mentioned in the previous post, the backyard pond turned into a major construction project this year. I expect to pour concrete this weekend, so that biggest and most difficult portion is now almost done. Welding rebar on my hands & knees for 4 hours yesterday afternoon really wore me out! I believe a tentative finishing date should be somewhere within the next couple of weeks. As opposed to the old 5-gallon pail, the new sump is a significant upgrade, now holding probably around 40 gallons. The big blue thing in there is the top 3rd of a 50-gallon poly-drum. It’s 16 inches below the water line, forming the lower pump compartment, with an access panel. Proper filter media goes on top of the pump compartment, covered with landscape rock forming a small pool under the outlet:

Sump
Water level will come up at least a full 6 inches, with alot of digging still left to do. The other 2/3 of the blue poly barrel will form the bottom of the pond itself, making it around 4 feet deep in the middle. I’d estimate total capacity to end up being in the 500 gallon range.

Sump
A concrete slab all the way around the edge will make it easy to seal. I got the largest liner Home Depot had – hope it’s big enough. We’ll be using red flagstone around the edges for finishing once again, and also to form a tall pyramid on top of the fountain pedestal. The pedestal will be finished with a polished surface color matching the flagstone. It should end up standing about eye-level at the top with LED lights under a small clear poly-carbonate dome where the water comes out. Two underwater LED’s will illuminate around the bottom.

The fountain is an interesting bit to me, from a design standpoint. It was the part that started the whole project after I decided the old store-bought item was not exactly what I wanted. This one is fairly solid, with 3-inch steel pipe support roots welded into a re-bar base going out 3 feet at a 45-degree angle. Standing back looking at it after that little concrete experiment inspired me to just tear it all apart a re-do the whole thing.

Sump