Please note that if these methods are used to solve the problem, the heater still cannot work because the fault leads to carbon deposition in the heater’s combustion chamber and the heater’s combustion chamber needs to be cleaned.
You may not know how to choose a diesel heater, you can read the article:
How to Choose the Best Diesel Heater?
When you read the article carefully, you will become a professional in choosing the best diesel heater
Here are the VVKB heaters :
Portable Heater Diesel Heater Diesel Coolant Heater
You can click on the picture below to select the VVKB diesel heater accessory.
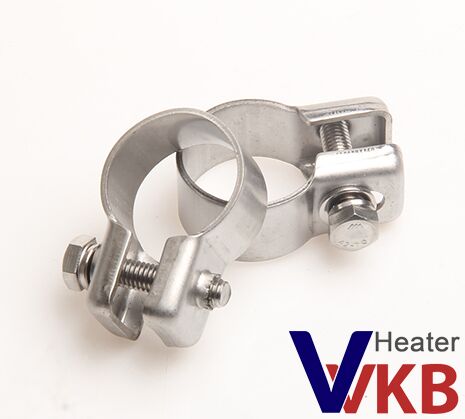
VVKB Fuel Pump VVKB Exhaust Pipe Exhaust Pipe Clamps
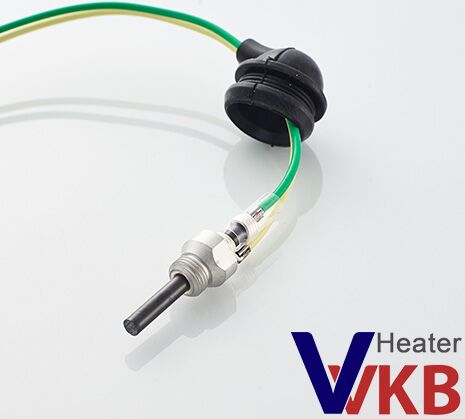
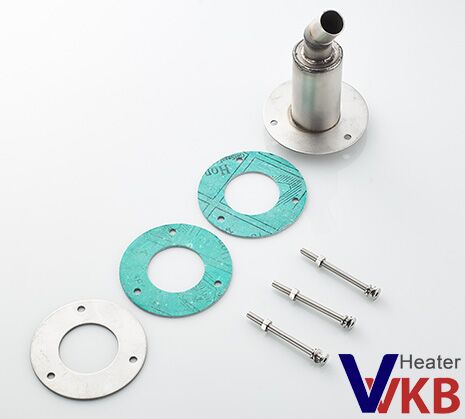
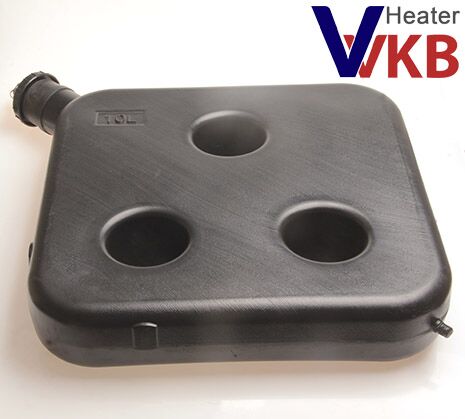
VVKB Glow Pin Exhaust Skin Fitting VVKB Diesel Fuel Tank
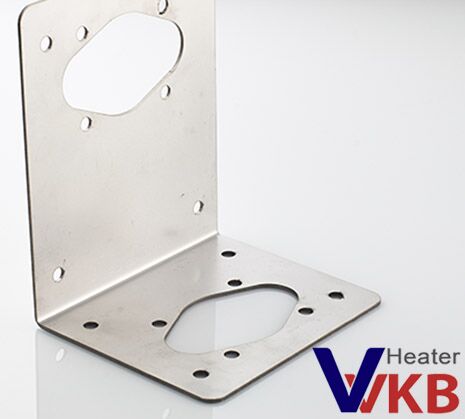
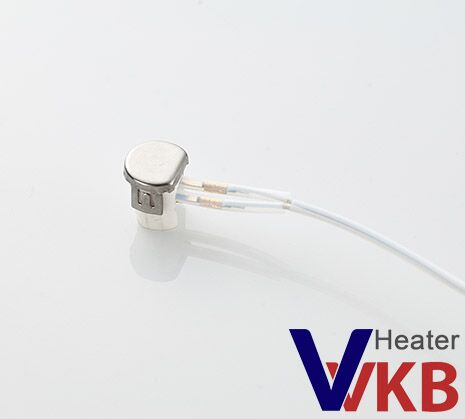
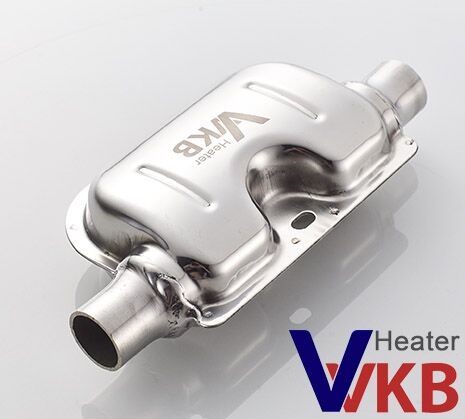
VVKB Mount Plate Overheat Sensor Exhaust Silencer
Please note the article on this troubleshooting. Suitable for most diesel heater failures. However, the fault code may be different.
If you need to replace the accessories, we recommend that you choose the VVKB diesel heater accessories, which are compatible with most heaters.
However, faulty accessories are often easily damaged.
VVKB diesel heaters have always been known for their reliable quality.
- Please note that most of the problems are caused by improper installation methods.
- There is also a part of the fault is the cable connection fails, resulting in parts cannot work properly.
- Please carefully check the various components.
Error code E01:
Cause of issue: Flame sensor open circuit
Solution:
- Check the overheat sensor, and reconnect the plug correctly.
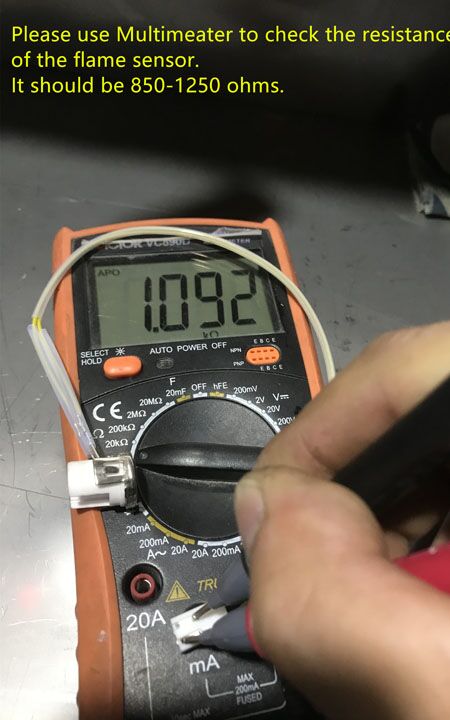
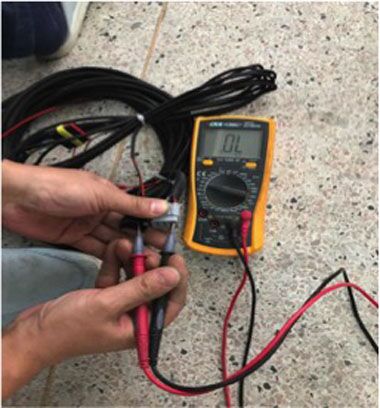
- 2, Please use the multimeter to check the resistance of the flame sensor. It should be 850-1250 ohms.
- 3, Check the plug of flame sensor whether it is loose.
Error code E02:
Cause of issue: Flame sensor short circuit
Solution:
- Check the flame overheat sensor with a multimeter. If it is a short circuit or open circuit, please repair or replace it.
- Check the flame overheat sensor with a multimeter whether it’s damaged. If it is, replace it.
please check whether the flame sensor is loose. - Take of the sensor, use a multimeter to check the resistance of the flame sensor. It should be 850-1250 ohms.
If the resistance is between 850-1250 ohms, check the sensor with following pics.
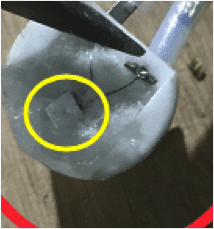
Check whether the copper wire in red circled parts touch the iron shell in yellow circled (The uneven cotton will make copper wire touch the iron shell, so E02 appears)
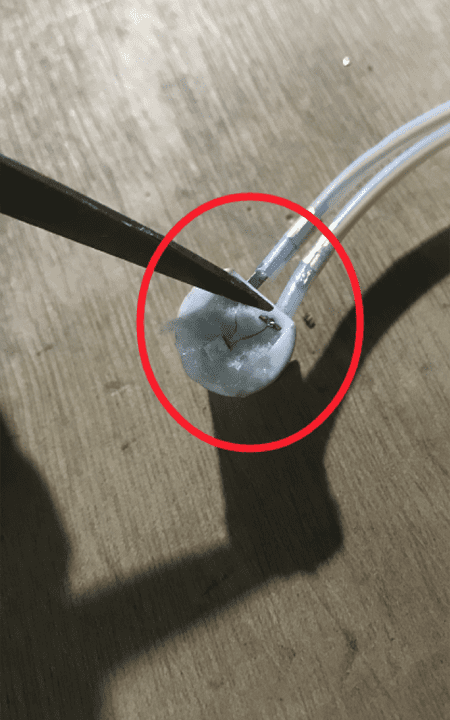

If the above is all ok, please flatten the cotton, then put on the iron shell and install the flame sensor. Restart to check whether there is still E02.
Note: The cotton can’t cover the yellow circled part.
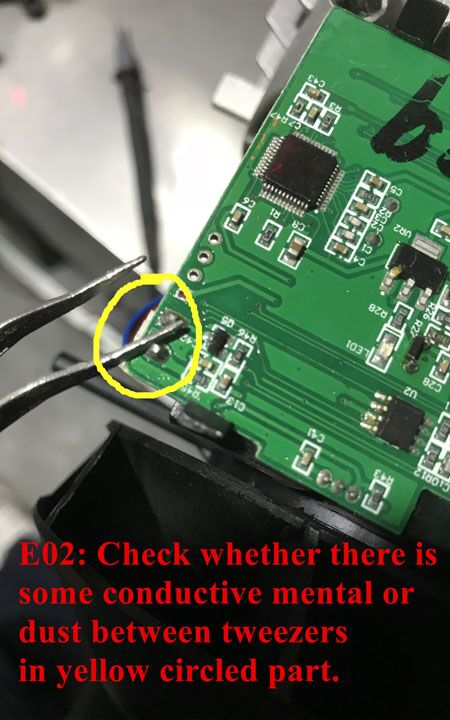
If there is still E02, please check whether there is some conductive mental or dust between tweezers in yellow circled part.
Clean the yellow part, but it there is still E02, the circuit board may fall faulty.
Error code E03
Cause of issue: Flame temperature exceeds the maximum safe temperature
Solution:
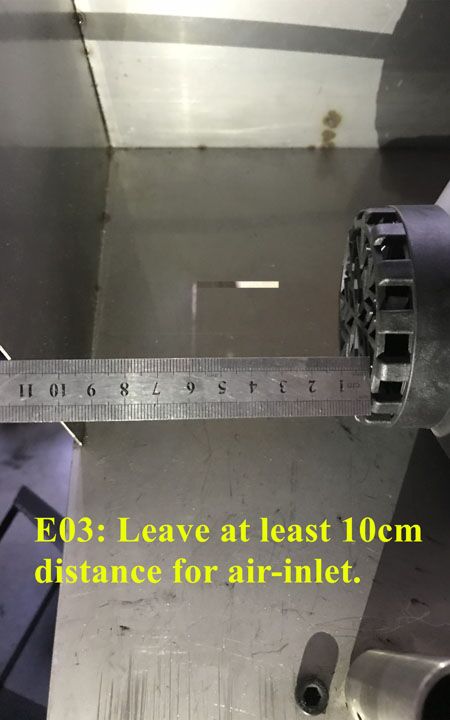
Check the air inlet, outlet, and the exhaust pipe whether it is blocked. If so, please clean up.
Leave an at least 10cm distance of air-inlet.
Check whether there is a blockage in air-outlet.

The fan may rub the plastic shell, resulting the fan turns slower.
Solution: Readjust the fan
Error code E04
Cause of issue: Flame temperature is lower than the minimum ignition temperature
Solution:
- Check whether there is fuel inside the tank. If not, please refueling.
- Check whether the fuel tube is blocked and whether the connection is intact, if not, please repair or replace it.
- Check whether the fuel is condensed. If so, please replace the fuel suitable for the environment
- Check whether the exhaust pipe is blocked. If so, please clean it up.
Please check whether there is sufficient fuel in the tank. If not, please add fuel.
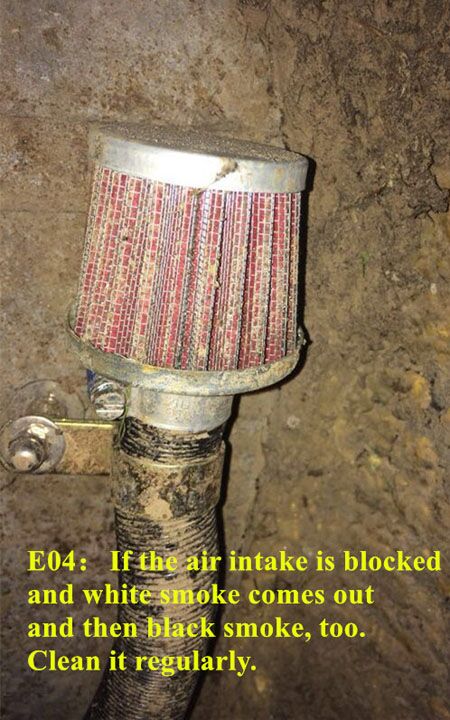
- If the air intake is blocked, and whether there will be white smoke coming out.
- If there is much black smoke coming out, the air-let is blocked during heating. Please clean it regularly.
- If you find it troublesome to clean the air intake regularly, you can just take it off.
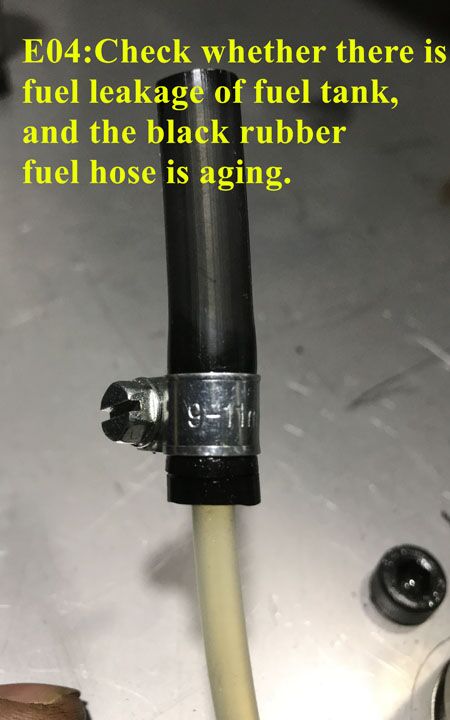
Please check whether there is fuel leakage of the fuel tank, and the black rubber fuel hose is aging.
Please check whether the fuel pipe is blocked, and each pipe/hose connection is well. If so please clean or change a new one.
- Please check whether the fuel filter leaks. (Put it into the water. Bubbling means it’s broken.)
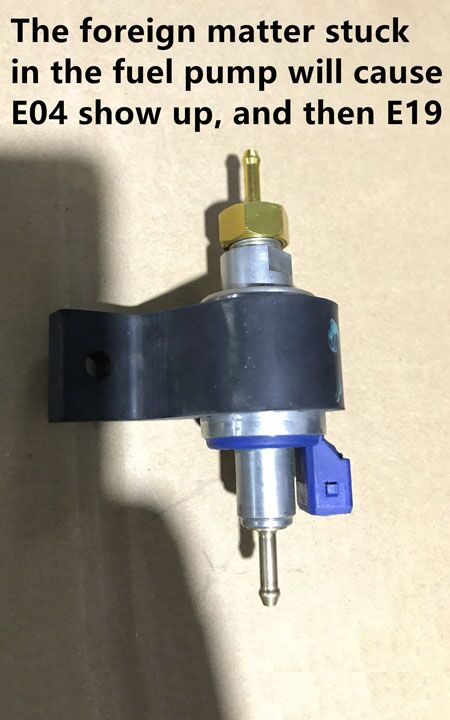
Check whether the fuel is condensed. If so, please replace the fuel suitable for the environment - Please check whether there is Impurity in the fuel, which makes the fuel pump blocked. If so, please clean the fuel pump and change the fuel.
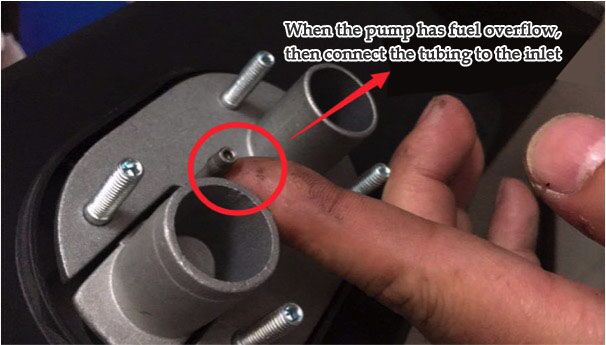
- Newly received heater, check whether there is air tubing. Disconnect the fuel pipe with heater, and let the fuel pump automatically pump oil.
When the fuel is full and coming out from pipe, connect the fuel pipe into the heater
Error code E07:
Cause of issue: Power supply voltage is too high
Solution:
Use the multimeter to check the voltage power. If it’s lower than DC 20V, please charge the battery or use a new one; if it’s higher than DC 30V, please use a new battery.
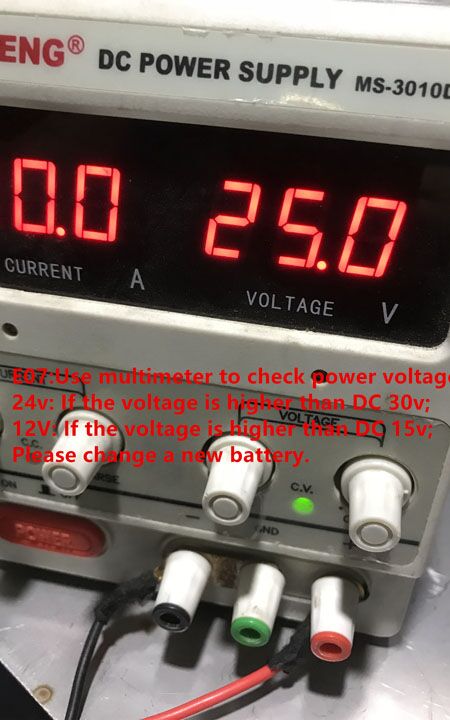
- Use the multimeter to check the power voltage:
- 24V: If the voltage is higher than DC 30v;
- 12V: If the voltage is higher than DC 15v
- Please change a new power.
- Or maybe you bought a heater with wrong model.
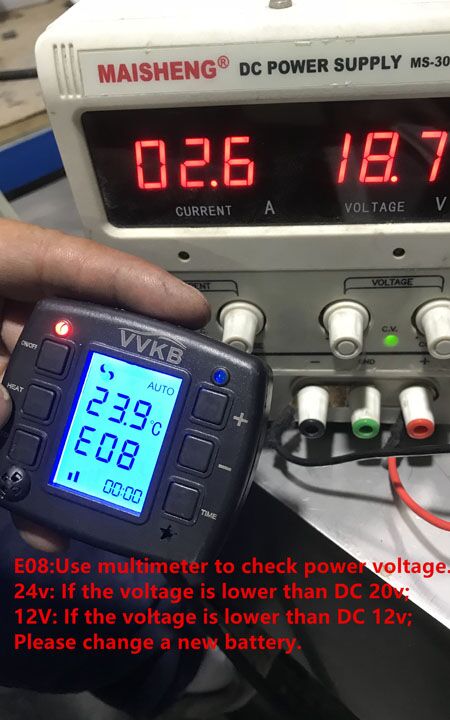
Error code E08
Cause of issue: Power supply voltage is too low
Solution:
Use the multimeter to check the voltage power. If it’s lower than DC 10V, please charge the battery or use a new one; If it’s higher than DC 15V, please use a new battery.
- Use multimeter to check the power voltage
- 24v: If the voltage is lower than DC 20v;
- 12V: If the voltage is lower than DC 10v.
- Please change a new power.
- Or maybe you bought a heater with wrong model.
Error code E09
Cause of issue: Heating glow pin short circuit
Solution:
Check if the glow pin is broken. If true, please replace it; use the multimeter to check the resistance value between two leads of the glow pin. The value should be within 1-4 Ohm. Please replace it if not.
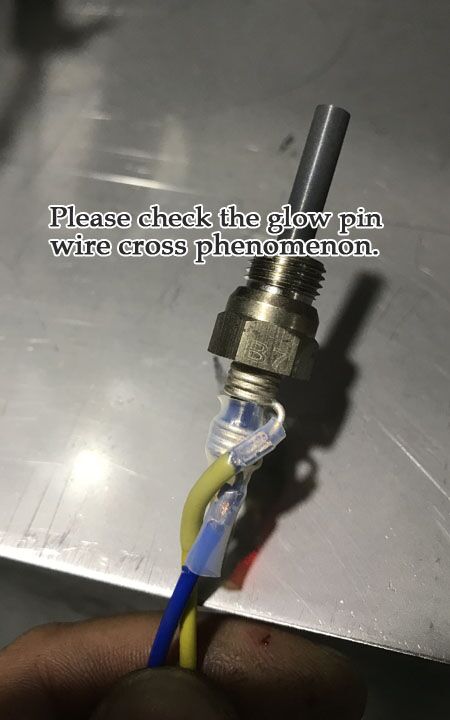
- Please check the plug of glow pin, whether it’s loose or broken.
- Check two wires of glow pin is twined.(lead to short circuit)
Check whether the glow pin touch the mental shell.(see the pic. That shows already touched.)
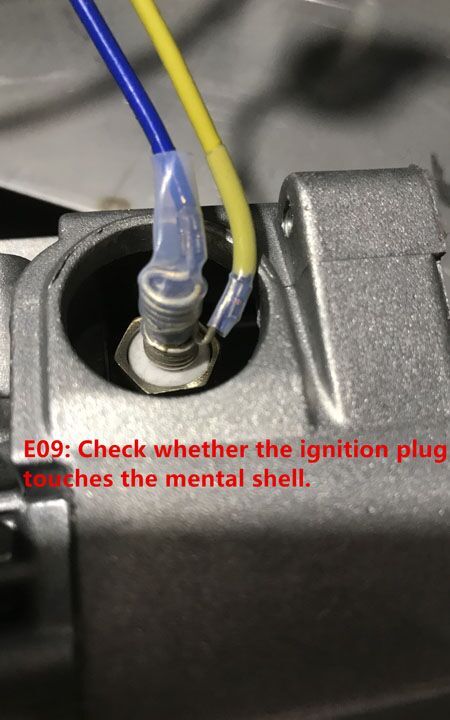
- Take the glow pin off, and re-installed to see whether it’s Ok then.
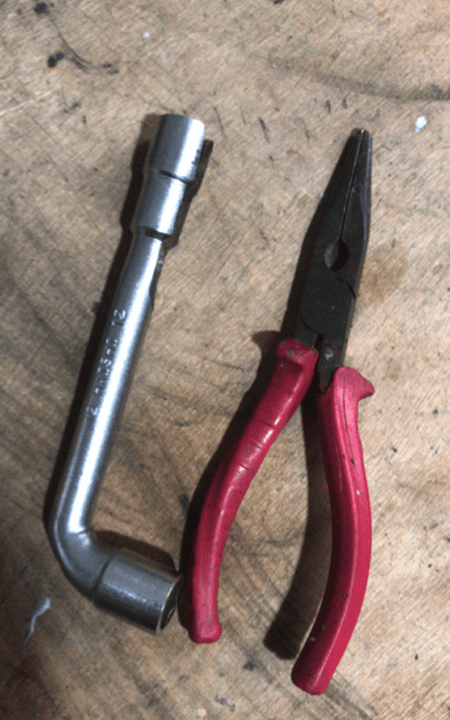
- Operation: Take apart the plastic casing.Take off the glow pin by rotating out of the aluminum shell.
- If you can’t take it off, you need the tool to help you
Use the multimeter to check the resistance of glow pin. If the number is not between following data, please replace.
- 24V resistance:1.2-1.4 ohms
- 12V resistance:0.5-0.7 ohms
- Place 12v glow pin onto 24V one, E09 will show up.
Error code E11
Cause of issue: Heating glow pin open circuit
Solution:
Please connect the lead properly if it’s loose.
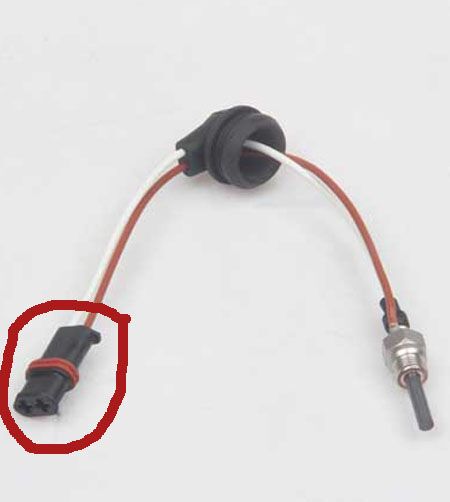
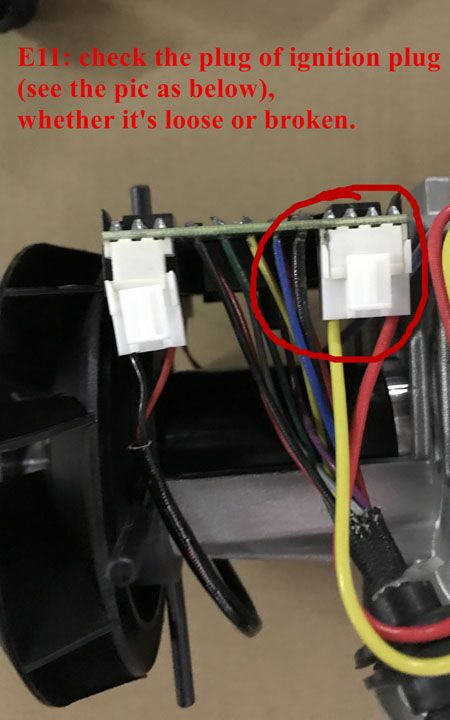
Please check the plug of glow pin (see the pic as below), whether it’s loose or broken.
Take the glow pin off, and re-installed to see whether it’s Ok then.
The next step, please refer to E09
Error code E12
Cause of issue: Fan motor is not connected properly.
Solution:
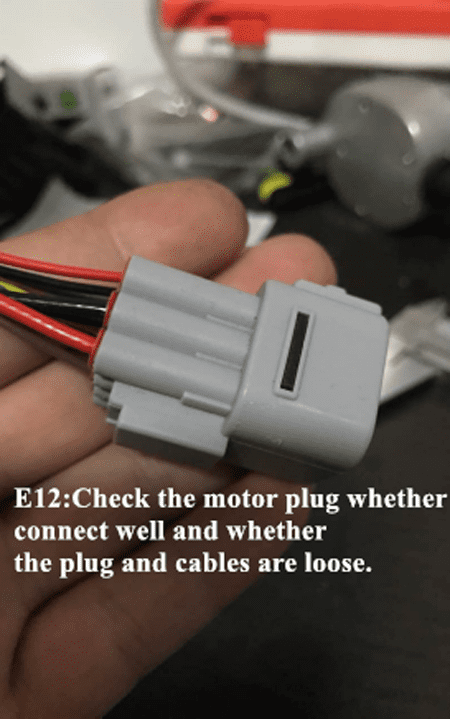
- Please connect the electric motor plug properly if it’s loose.
- Please check the motor plug whether connect well and whether the plug and cables are loose.
Whether the fan is blocked and can’t spin. (rude transportation)
Solution: Adjust the distance between the fan and the housing.
Error code E13
Cause of issue: Combustion blower motor short circuit
Solution:
- Test (electrically) the electric motor to see if it operates properly. Please replace it if not.
- Check whether connect the 12v heater into 24v battery.
- Use multimeter to test the motor when power on ( instruction as below)
- 12V resistance is 6-8 ohms; 24V resistance is 14-16 ohms
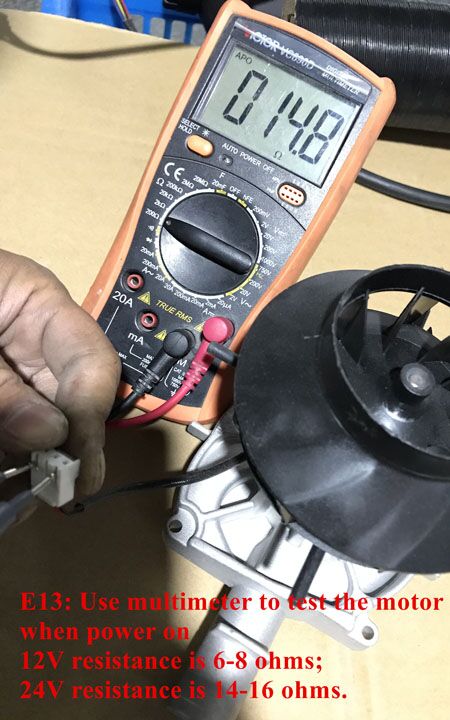
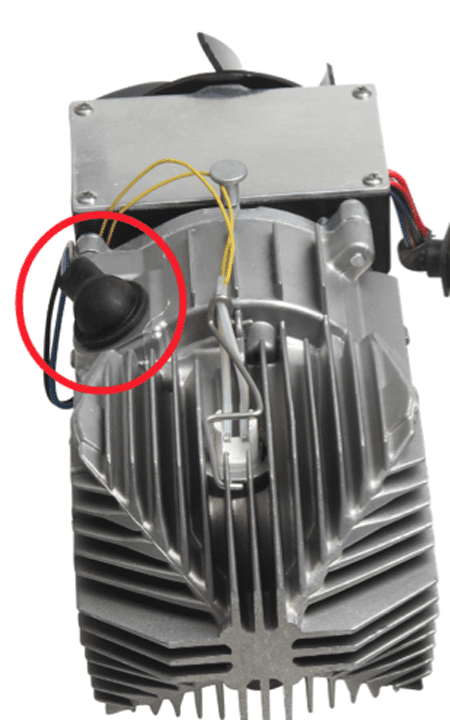
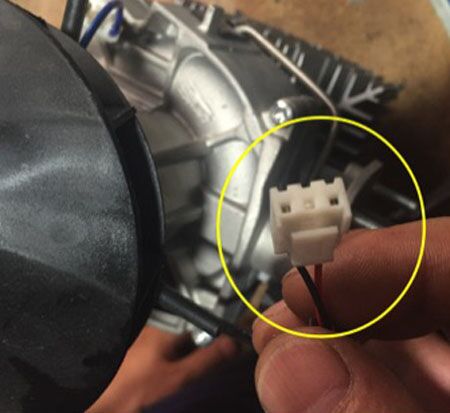
- If there is no multimeter or don’t know how to use it, connect directly two battery wires to the yellow circled part in pic, to check whether the fan can spin.
- If not, it shows the motor is broken.
(Note: Make sure the voltage must be matched.)
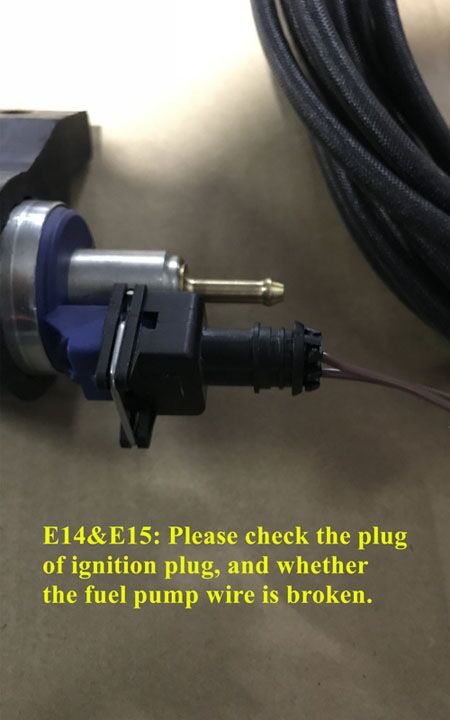
Error code E14 & E15
Cause of issue: Electromagnetic pump faults
Solution:
- Please reconnect the lead if it’s loose.
- Use the multimeter to check the resistance value of fuel pump. It should be within 15-25 Ohm. Please use another if the value is out of range.
- E14&E15: Please check the plug of the ignition plug, and whether the fuel pump wire is broken.
Error code E16
Cause of issue: Serial error between the electronic control unit and the heater
Solution:
- Please correct the serial connection
- Check wires, cables and plug whether broken or loose.
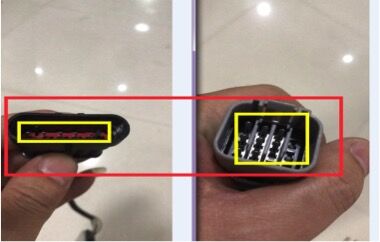
- Each wire of color must be matched. Check the pics as below.

Pin of the plug is broken or missing. See the pics as below.
If the above is all good, please check the cable again. Disconnect and then reconnect. And use the multimeter to check as below.
Error code E19
Cause of issue: Heater cannot start successfully
Solution:
- Please check whether there is fuel in the fuel tank; check whether there is carbon in the air outlet. If have, please clean the carbon; Aging of glow pin.
- Newly-received heater: E19 shows up just after installation and try for the first time.(already switch to heating mode, but no warm air comes out.It’s the problem of fuel.)
- After E19 shows up,re-start the heater, there may be smoke coming out. Just leave it smoking,
- Need pump fuel: Press the ON button for 5s for automatically fuel-pumping. Then press for 10s to discharge the fuel
- Re-start the heater to see whether the problem is solved.
- Some newly-bought heater need to pump the fuel firstly because there is air in the fuel pipeline
If still not work, check whether there is air in the fuel pipe. Check whether there is smoke coming out from the exhaust pipe.
If not, the fuel pump is faulty.